Peking duck recipe: Best Crispy Skin at Home
This Peking duck recipe air-dries the duck for 24 hours, then roasts at 375°F for 90 minutes until skin shatters like glass and meat reaches 165°F (74°C). The secret to crispy skin is separating it from fat through boiling water treatment, then drying uncovered in the refrigerator overnight.
Most home cooks think Peking duck is impossible to make at home—that shatteringly crispy, mahogany-lacquered skin and tender, juicy meat is reserved for Chinese restaurants with specialized ovens. You’ve probably tried roasting duck only to end up with rubbery, chewy skin and greasy meat that tastes nothing like the real thing.
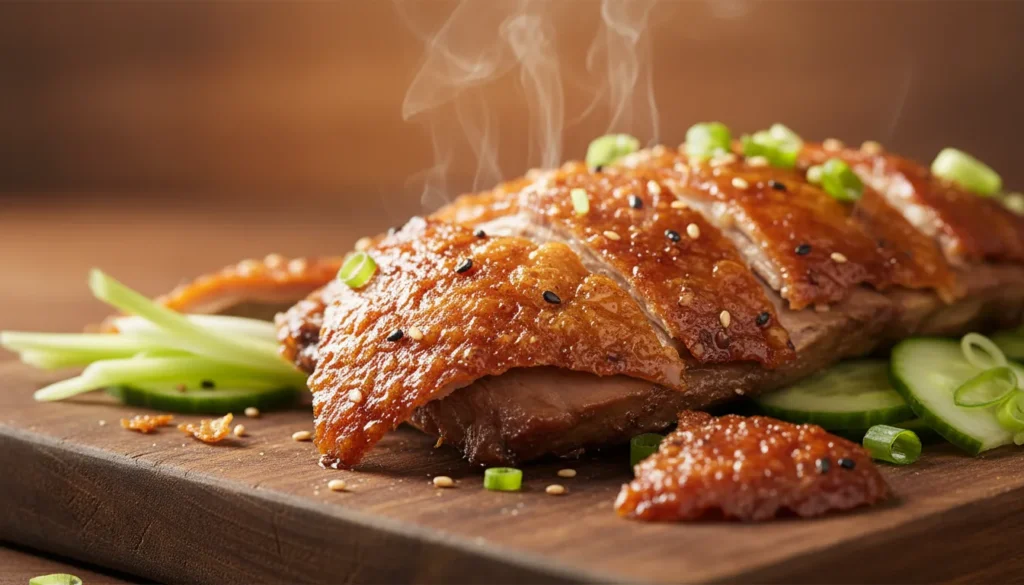
The solution? This Peking duck recipe brings authentic Beijing-style results to your home kitchen. No special equipment, no hanging hooks, no fear—just impossibly crispy skin that crackles like thin glass and succulent meat infused with aromatic five-spice flavor.
Why it works: Traditional Peking duck involves air-drying the duck to remove moisture from the skin, then roasting at high heat. The boiling water blanching step separates the skin from the fat layer beneath, allowing it to puff and crisp during roasting instead of staying flabby and greasy. Combined with a maltose glaze that caramelizes into that iconic lacquered finish, you achieve restaurant-quality results that’ll impress even the most discerning guests.
Preview: Get ready to make this Peking duck recipe your showstopping special occasion meal. Once you master the technique, you’ll never look at store-bought rotisserie birds the same way.
Why This Peking Duck Recipe Works
- Restaurant results at home – Authentic crispy skin without specialized equipment
- Make-ahead friendly – Most work happens 24 hours before roasting
- Impressive presentation – Carved tableside, it’s pure theater
- Serves a crowd – One duck feeds 4-6 people generously
- Multi-use ingredients – Leftover duck makes incredible fried rice, soup, and pancakes
- Worth the effort – The crackling skin alone justifies the time investment
- Traditional technique – Authentic Beijing method adapted for home kitchens
Choosing the Best Duck
Duck Selection: For this Peking duck recipe, choose a whole duck weighing 4-5 pounds—any larger and it won’t fit in standard home ovens; any smaller and the meat-to-bone ratio disappoints. Fresh duck is ideal but frozen works perfectly—just thaw completely in the refrigerator for 2-3 days (never at room temperature).
Quality Tips: Long Island (Pekin) duck is the traditional choice—it’s the breed developed specifically for Peking duck with plump breasts and ample fat for rendering. Look for air-chilled duck if available; it has drier skin that crisps more readily than water-chilled duck. Organic or heritage breed ducks (like Muscovy) have richer, more pronounced flavor but leaner meat—they work but won’t be quite as juicy.
Fresh vs. Frozen: Most grocery stores sell frozen whole duck. Quality doesn’t suffer from freezing, so don’t hesitate. Thaw in refrigerator for 48-72 hours depending on size. Check the cavity—sometimes giblets are tucked inside and need removal before cooking.
Age Matters: Younger ducks (under 6 months) have more tender meat and thinner skin that crisps faster. Check the label or ask your butcher. Older ducks develop tougher meat that benefits from slower cooking methods like braising rather than roasting.
Prep Safety—Crucial Tip: Do not wash raw duck. Rinsing poultry under running water creates aerosolized bacteria droplets that spray Salmonella and Campylobacter across a 3-foot radius onto countertops, utensils, and sink fixtures. Cooking duck to 165°F kills all pathogens—water cannot. Simply pat the duck dry inside and out with paper towels, then immediately wash your hands with soap and hot water for 20 seconds. Use separate cutting boards for raw poultry and ready-to-eat ingredients.
Ingredients List
| Quantity | Ingredient |
|---|---|
| 1 (4-5 lb) | Whole Duck (fresh or completely thawed) |
| 8 cups | Boiling Water |
| 3 tbsp | Maltose or Honey |
| 2 tbsp | Rice Vinegar |
| 1 tbsp | Soy Sauce |
| 1 tsp | Five-Spice Powder |
| 1 tsp | Kosher Salt |
| 3 | Star Anise (whole) |
| 3 slices | Fresh Ginger (1-inch pieces) |
| 3 | Scallions (cut into 2-inch pieces) |
| 12-16 | Mandarin Pancakes (store-bought or homemade) |
| ½ cup | Hoisin Sauce (for serving) |
| 1 | Cucumber (julienned, for serving) |
| 6 | Scallions (julienned, for serving) |
Ingredient Notes
The Duck (The Star): A 4-5 lb duck is perfect for home ovens and feeds 4-6 people with generous portions. Duck has significantly more fat than chicken or turkey—this isn’t a problem; it’s the feature. That fat renders during roasting, basting the meat while the skin crisps.
The Maltose (Lacquer Secret): Maltose syrup (available at Asian grocers) creates that iconic glossy, mahogany finish on Peking duck skin. It’s less sweet than honey but caramelizes beautifully at high heat. If you can’t find maltose, substitute honey thinned with a tablespoon of hot water—the result is slightly sweeter but still produces gorgeous, crispy skin.
The Rice Vinegar (Drying Agent): The acid in rice vinegar helps dry the skin during the air-drying phase, contributing to extra crispiness. It also adds subtle tang that balances the rich duck fat. Never substitute regular white vinegar—it’s too harsh. Rice vinegar’s gentle acidity is essential.
The Five-Spice Powder (Aromatic Soul): This Chinese spice blend (star anise, cloves, cinnamon, Sichuan peppercorns, fennel) provides the signature Peking duck flavor. The aromatics you place inside the cavity (star anise, ginger, scallions) perfume the meat from within as they steam during roasting.
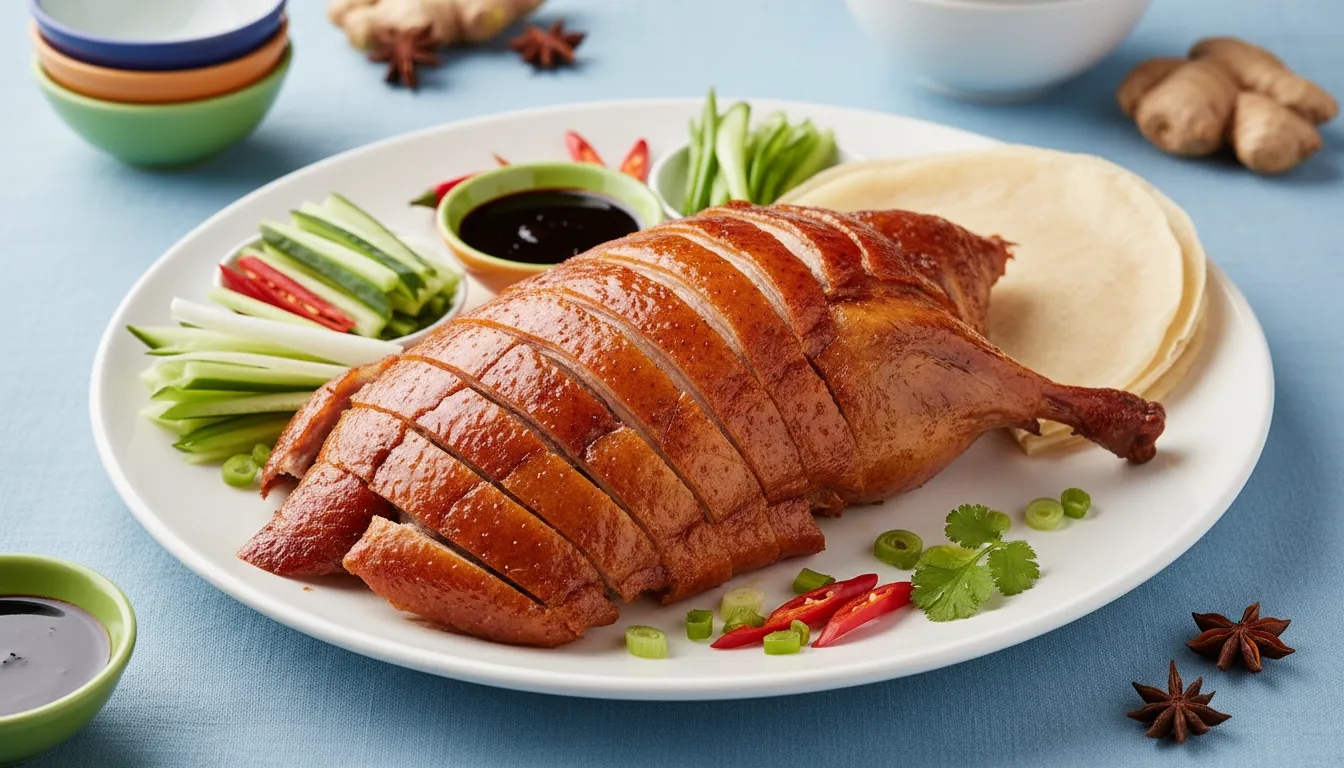
The Serving Components (Traditional Presentation): Peking duck is traditionally served wrapped in thin Mandarin pancakes (flour tortillas work in a pinch) with julienned cucumber, scallions, and hoisin sauce. This interactive eating style is half the experience—crispy skin and tender meat wrapped in soft pancakes with crunchy vegetables and sweet-savory sauce.
Step-by-Step Instructions
Recipe Card
🛠 Equipment Needed
- Large roasting pan or sink
- wire rack
- rimmed baking sheet
- instant-read thermometer
- basting brush
- sharp knife or poultry shears
Prep: Blanching and Air-Drying (Day 1)
Remove duck from packaging and remove giblets and neck from the cavity. Pat the duck completely dry inside and out with paper towels—this is critical.
Bring 8 cups water to a rolling boil. Place the duck in a large roasting pan or your sink. Slowly pour the boiling water over the entire duck, rotating to ensure all skin is exposed to the hot water. This blanching tightens and separates the skin from the fat layer beneath—the key to crispy skin.
Pat the duck dry again thoroughly. The skin should feel taut and smooth.
In a small bowl, whisk together maltose (or honey), rice vinegar, and soy sauce until smooth. Brush this mixture all over the duck’s exterior, coating every inch of skin. The glaze should be thin and even.
Stuff the cavity with star anise, ginger slices, and scallion pieces. These aromatics aren’t for eating—they perfume the meat from within.
Place duck breast-side up on a wire rack set over a rimmed baking sheet. Refrigerate uncovered for 24 hours—this air-drying step is absolutely non-negotiable. The exposed skin dries out completely, which is what creates that glass-like crispiness. The duck will look leathery and stiff—this is exactly what you want.
The Cook: High-Heat Roasting (Day 2)
Remove duck from refrigerator and let it sit at room temperature for 30 minutes before roasting—this ensures even cooking.
Preheat oven to 375°F (190°C) with the rack in the lower third position.
Place the duck (still on its wire rack over the baking sheet) in the oven. Do not cover, do not add water—you want dry heat to crisp the skin.
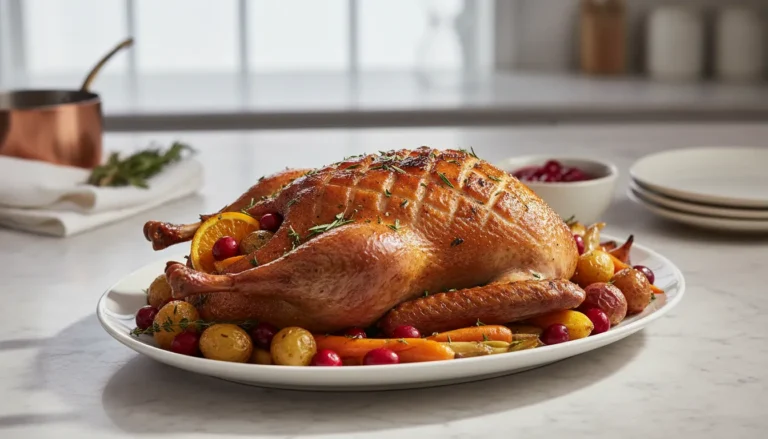
Roast for 60 minutes, then rotate the pan 180 degrees for even browning. Continue roasting for another 30-40 minutes (90-100 minutes total) until the skin is deep mahogany brown and crackling crispy.
The Doneness Test
The duck is done when juices run clear (not pink) when you pierce the thigh joint. Critical safety step: Insert an instant-read meat thermometer into the thickest part of the thigh without touching bone. It must read 165°F (74°C) minimum.
Duck breast can safely go to 135-140°F for medium-rare if you prefer (duck breast is safe at lower temperatures than chicken), but the thigh must reach 165°F. Most home cooks prefer duck cooked to 165°F throughout for uniform doneness.
The skin should be deeply browned and shatter when tapped—it should sound hollow and crisp. If the skin hasn’t crisped by the time the meat reaches temperature, increase oven to 425°F for the final 10 minutes, watching carefully to prevent burning.
Resting and Carving
Transfer the duck to a cutting board and tent loosely with foil. Let it rest for 15-20 minutes—this allows juices to redistribute throughout the meat. If you carve immediately, the precious juices spill out, leaving drier meat despite perfect cooking.
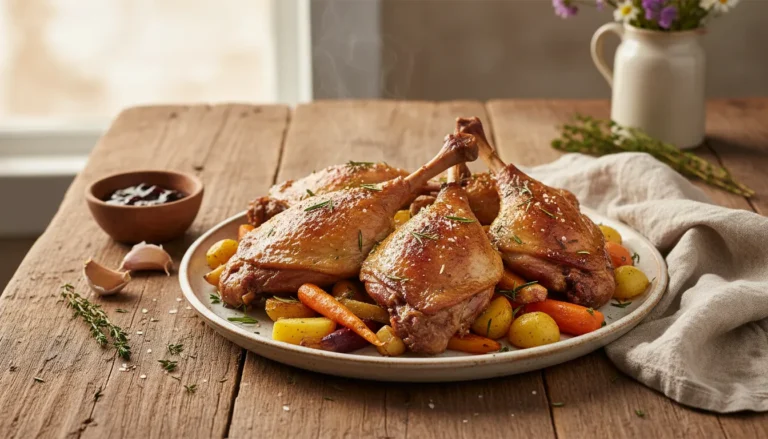
Traditional carving: Remove the crispy skin in large sheets and slice into 2-inch squares. Then carve the meat from the breast and legs, slicing thinly. Arrange skin and meat separately on a platter for dramatic presentation—guests assemble their own pancakes.
3 Secrets for Glass-Like Crispy Skin
Tip 1: The 24-Hour Air-Dry is Sacred: This is the single most important step in this Peking duck recipe. Never skip or shorten the air-drying time—12 hours produces mediocre results; 24-48 hours creates that legendary shatter-crisp skin. The refrigerator’s dry air pulls moisture from the skin’s surface. Some recipes suggest using a fan pointed at the duck to accelerate drying—this helps but isn’t necessary.
Tip 2: Blanch Thoroughly for Skin Separation: The boiling water treatment must cover every inch of skin. Pour slowly and rotate the duck so water flows over wings, legs, back, and breast. This heat shock causes the skin to contract and separate from the fat layer beneath. When skin and fat are separated, the fat renders out during roasting while the skin puffs and crisps—when they’re still connected, you get chewy, greasy skin.
Tip 3: Don’t Add Liquid to the Roasting Pan: Beginners often add water or broth to the pan “for moisture”—this is exactly wrong for Peking duck. Dry heat is essential for crispy skin. The liquid creates steam that softens skin into rubber. Let the rendered duck fat drip into the pan (save it for roasting potatoes—it’s incredible), but never add water.
Serving Suggestions
Traditional Presentation: Serve Peking duck with warm Mandarin pancakes, hoisin sauce, julienned cucumber, and julienned scallions. Guests spread hoisin on a pancake, add crispy skin and meat, top with vegetables, roll, and eat—it’s interactive dining at its finest.
Rice Accompaniments: Serve alongside steamed jasmine rice, vegetable fried rice, or sticky rice to soak up the rich juices.
Vegetable Sides: Balance the rich duck with light, crisp vegetables: stir-fried bok choy, Chinese broccoli (gai lan), cucumber salad, or pickled vegetables.
Soup Course: Start the meal with hot and sour soup or egg drop soup to whet appetites.
Leftover Magic: Don’t discard the carcass—simmer it with ginger, scallions, and water for rich duck stock. Use leftover meat for duck fried rice, duck noodle soup, or duck lettuce wraps.
For comprehensive poultry cooking techniques, explore The Ultimate Guide to Cooking Chicken: Techniques & Tips.
Storage & Reheating
Refrigerator: Remove meat from the bones within 2 hours of cooking. Store skin and meat separately in airtight containers for 3-4 days maximum. The skin loses crispiness during storage but can be recrisped.
Freezing: Duck meat freezes well for up to 3 months. Don’t freeze the skin—it becomes soggy and won’t recrisp properly. Freeze meat in portions with parchment between pieces.
Recrisping Skin: Place leftover skin on a wire rack over a baking sheet and bake at 400°F for 8-10 minutes until crispy again. Watch carefully—it can burn quickly.
Reheating Meat: Place sliced duck in a covered dish with 2 tablespoons of water or broth. Warm at 300°F for 15-20 minutes until heated through. Low, gentle heat prevents the meat from drying out or becoming tough.
Frequently Asked Questions
- Is it safe if the meat near the bone is pink?
If your thermometer reads 165°F (74°C) in the thigh, yes, it’s safe. Duck breast is often served medium-rare (135°F) in restaurants—it’s safe at lower temperatures than chicken. However, the thigh must reach 165°F. Pink color near bones can result from young duck’s bone marrow—temperature is the only reliable indicator. - Can I use frozen duck for this Peking duck recipe?
Absolutely—most duck sold in grocery stores is frozen. Thaw completely in the refrigerator for 2-3 days (never at room temperature). The duck must be fully thawed before the blanching step, or the boiling water won’t properly separate the skin from fat. - What if I don’t have 24 hours for air-drying?
Minimum 12 hours produces acceptable results, but the skin won’t achieve that legendary glass-like crispness. If you’re truly pressed for time, use a fan pointed directly at the duck in the refrigerator and increase drying time as much as possible. There’s no shortcut that equals 24 hours of passive air-drying. - How do I get crispier skin?
Ensure the duck is completely dry before applying glaze, refrigerate uncovered for the full 24 hours, and never add liquid to the roasting pan. Some cooks finish under the broiler for 2-3 minutes, watching like a hawk to prevent burning. The air-dry step is 80% of the battle.
Conclusion
This Peking duck recipe proves that restaurant showstoppers aren’t beyond home cooks willing to plan ahead. While the 24-hour air-drying requires patience, the actual hands-on work is minimal—and the reward is duck with skin so crispy it shatters like thin glass and meat so tender and flavorful it needs no sauce.
Remember the key principles: blanch with boiling water to separate skin from fat, glaze evenly with maltose, air-dry uncovered for 24 hours, roast at high heat without added liquid, and always verify 165°F in the thigh. Master this traditional technique, and you’ll have a signature dish that impresses everyone who tastes it.
Did this Peking duck recipe change your special occasion cooking game? Leave a comment sharing your results—I love hearing about readers’ crispy-skin victories!