How to Cook a Steak in the Oven: Best Broiler Method
Position oven rack 4-6 inches from broiler element and preheat on high for 10 minutes. Broil seasoned steaks for 4-6 minutes per side for medium-rare, watching closely to prevent burning. The intense top-down heat creates restaurant-quality char and crisps the fat cap beautifully without needing a stovetop.
Your apartment lease forbids outdoor grilling, your stovetop sears fill the kitchen with smoke, and yet you’re craving that steakhouse char—the kind that crisps fat edges and creates genuine crusty texture. You’ve tried pan-searing, but your smoke alarm disagrees violently. The frustration of wanting perfectly cooked steak without the right equipment or living situation is real.
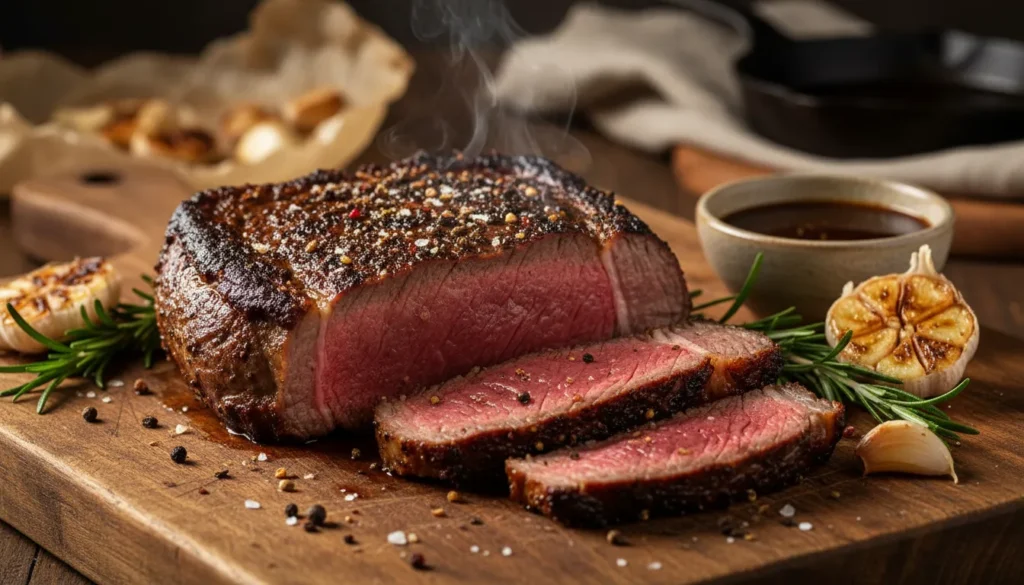
The solution is learning how to cook a steak in the oven using your often-neglected broiler setting. The broiler provides intense, direct heat from above—essentially an upside-down grill that creates similar char without smoke alarms or outdoor space. This method excels at crisping fat caps and developing deep caramelization that baking alone can’t achieve.
Professional steakhouses use salamander broilers (commercial overhead broilers) for finishing touches on expensive cuts. Your home broiler works on the same principle, delivering concentrated radiant heat that sears surfaces without overcooking interiors. The technique is particularly effective for well-marbled cuts where rendering and crisping fat matters. For comprehensive guidance on selecting cuts that benefit most from broiling, visit our ultimate guide to beef steak cuts.
Grab your broiler pan and position that rack. We’re making steakhouse-quality char without leaving your kitchen.
Why This Broiler Method is Better Than Other Oven Techniques
- Intense top-down heat mimics grill temperatures (500-550°F)
- Crisps fat beautifully for steaks with prominent fat caps (ribeye)
- No stovetop smoke fills your apartment
- Works in any kitchen regardless of ventilation or outdoor access
- Fast cooking prevents interior overcooking
- Requires minimal equipment—just a broiler pan or cast iron skillet
- Creates authentic char with Maillard reaction complexity
Choosing the Best Steak for Broiling
The Cut: Ribeye is the star performer under the broiler—its abundant marbling and fat cap crisp beautifully under intense heat. New York strip works excellently. Filet mignon is acceptable but lacks the fat that makes broiling special. Avoid lean cuts like sirloin that dry out under such aggressive heat.
Thickness: Buy steaks 1 to 1.5 inches thick. Thinner steaks overcook before developing char; thicker ones develop exterior char while the interior stays raw. This thickness range is the sweet spot for learning how to cook a steak in the oven with a broiler.
Fat Cap Importance: Look for steaks with substantial marbling and a visible fat cap on one edge. The broiler’s intense heat renders this fat while crisping it to bacon-like texture—one of the method’s greatest advantages. According to the USDA’s beef marbling standards, Choice and Prime grades provide the marbling necessary for successful broiling.
Buying Tips: Choose steaks with consistent thickness from end to end. Tapered steaks cook unevenly under the broiler’s focused heat, with thin ends burning while thick portions remain rare.
Ingredients List
| Quantity | Ingredient |
|---|---|
| 2 (12-14 oz) | Ribeye steaks with fat cap (1-1.5 inches thick) |
| 2 tbsp | High-heat oil (avocado or vegetable oil) |
| 2 tbsp | Unsalted butter (optional, for finishing) |
| 2 cloves | Fresh garlic, smashed (optional) |
| 2 sprigs | Fresh rosemary or thyme (optional) |
| 2 tsp | Kosher salt |
| 1 tsp | Coarse black pepper |
| 1/2 tsp | Garlic powder (optional) |
Ingredients Notes
The Oil: Brush steaks lightly with high-smoke-point oil before broiling. This promotes browning and prevents sticking to the broiler pan. Avocado oil (520°F smoke point) handles broiler temperatures best. Don’t use olive oil—it smokes and tastes acrid under intense heat.
The Salt: Apply kosher salt generously 40 minutes before broiling and leave steaks uncovered at room temperature. This dry-brining draws out surface moisture, creating the dry exterior necessary for proper crust formation. Last-minute salting works but doesn’t penetrate as deeply.
Why Less Aromatics: Unlike stovetop methods where you can actively baste with butter and herbs, broiler cooking happens quickly with less opportunity for aromatic infusion. Keep it simple: salt, pepper, and maybe garlic powder.
Step-by-Step Instructions: How to Cook a Steak in the Oven
Recipe Card
🛠 Equipment Needed
- Broiler Pan or Cast Iron Skillet
- Instant-Read Thermometer
- Kitchen Tongs
- Oven Mitts
- Basting Brush
Prep & Dry Brining
Remove steaks from refrigeration 45-60 minutes before cooking. Pat both sides completely dry with paper towels—critical for crust development.
Season both sides generously with kosher salt and black pepper. The salt should be visible on the surface. Optional: add garlic powder for extra savory depth. Let steaks rest uncovered at room temperature while you preheat the broiler.
Positioning and Preheating the Broiler
Adjust your oven rack to the upper position, typically 4-6 inches from the broiler element:
- 4 inches: For aggressive char and faster cooking (watch very closely)
- 5-6 inches: For more controlled cooking with still-excellent browning (recommended for beginners)
Turn broiler to HIGH setting. Preheat for 10-15 minutes minimum. Your broiler must be blazing hot—this isn’t optional. Many home cooks skip adequate preheating and wonder why their steaks don’t char properly.
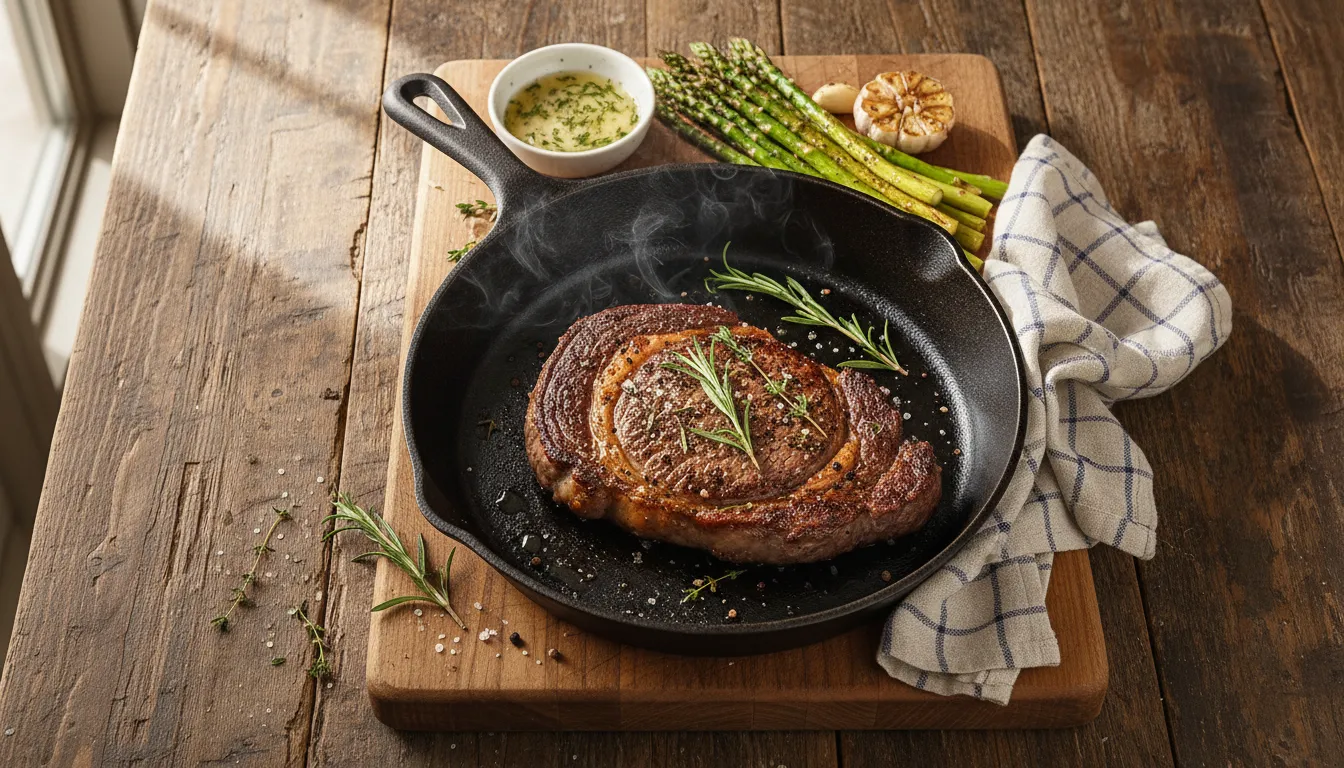
Place a cast iron skillet or broiler pan on the rack during preheating so it gets screaming hot.
Preparing the Steaks for Broiling
Brush both sides of steaks lightly with high-smoke-point oil. This promotes even browning and prevents sticking. Don’t drench them—a light coating suffices.
Position steaks fat-cap-side-up if they have one. The broiler’s top-down heat will render and crisp the fat beautifully on the first flip.
The Broiling Process
Using oven mitts, carefully remove the preheated pan from the oven. Place steaks on the hot surface—they should sizzle immediately. Return pan to the upper rack position.
First Side: 4-6 minutes Broil without opening the oven door for 4 minutes for 1-inch steaks, 5-6 minutes for 1.5-inch steaks. The surface should develop deep browning and char.
Critical: Watch through the oven window constantly during the last 2 minutes. Broilers vary wildly in intensity. Some will char perfectly at 5 minutes; others might burn at 4 minutes. The line between perfect char and burnt is thin under a broiler.
Flipping: Carefully remove the pan (use mitts—it’s extremely hot). Flip steaks with tongs. If you positioned them fat-cap-up initially, the rendered fat will have created a flavor base in the pan.
Second Side: 4-6 minutes Return to broiler. Cook for an additional 4-6 minutes depending on thickness and desired doneness. Begin checking internal temperature at the 3-minute mark.
Doneness Guide for Broiled Steak
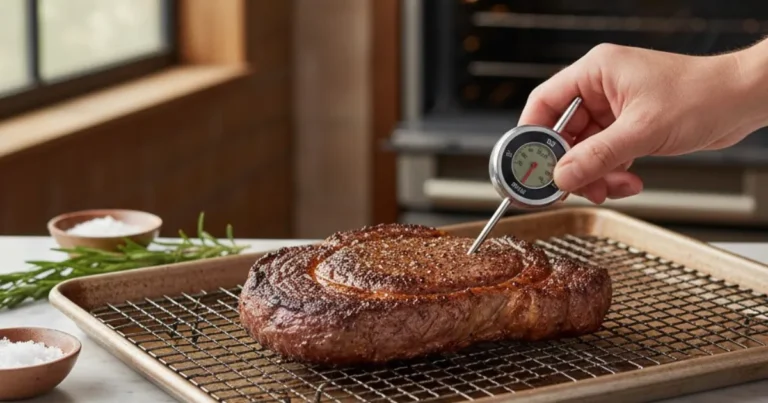
Because broiler heat is so intense and variable, rely heavily on a thermometer rather than timing alone:
- Rare: 120-125°F (cool red center)
- Medium-Rare: 130-135°F (warm red center) – RECOMMENDED
- Medium: 140-145°F (warm pink center)
- Medium-Well: 145-150°F (slightly pink)
Insert the thermometer horizontally into the thickest part, avoiding fat pockets and bone. Pull steaks 5 degrees below target temperature to account for carryover cooking during rest.
Optional Butter Finishing
For extra richness, remove steaks from the broiler and immediately top with a pat of butter, smashed garlic, and fresh herbs. The residual heat will melt the butter, creating a luxurious coating. This step is optional but adds restaurant polish.
Resting
Transfer steaks to a cutting board or warm plate. Tent loosely with foil and rest for 5-8 minutes minimum. Thicker steaks need the full 8 minutes. This allows proteins to relax and juices to redistribute throughout the meat.
Cutting immediately causes those flavorful juices to flood out onto the cutting board, leaving you with dry steak.
Expert Tips for Perfect Broiler Steaks
Tip 1: Know Your Broiler’s Hot Spots Most broilers have uneven heat distribution with a “hot spot” directly under the element. Place steaks slightly off-center or rotate the pan halfway through each side to prevent burning in one area while undercooking in another.
Tip 2: Crack the Oven Door Some chefs crack the oven door slightly during broiling to prevent the oven from cycling off. Gas broilers often require the door slightly ajar. Check your oven manual—some models demand this, others forbid it.
Tip 3: Use a Meat Thermometer Religiously Broiler intensity varies so wildly between ovens that timing guidelines are approximate at best. A $15 instant-read thermometer is non-negotiable for consistent results when learning how to cook a steak in the oven via broiling.
Tip 4: Pat Dry Again Before Broiling Even after initial drying and salting, moisture can accumulate on the surface. Give steaks one final pat with paper towels immediately before oiling and broiling.
Tip 5: Ventilation Matters While broiling produces less smoke than stovetop searing, it still generates some. Turn on your exhaust fan and open a window if your smoke alarm is sensitive.
Serving Suggestions & Steakhouse Sides
Sides: The broiler’s high heat makes it ideal for simultaneously cooking vegetables. Try broiled asparagus, bell peppers, or thick-cut tomatoes alongside your steaks. Add them during the steak’s final 4 minutes for perfect timing.
Sauces: Broiled steak’s intense char pairs beautifully with rich sauces that don’t compete with that crust. Red wine reduction, béarnaise, or compound butter (herb, blue cheese, or garlic butter) add elegance. Chimichurri provides bright contrast.
Wine Pairing: The char and crisped fat of broiled ribeye demand full-bodied reds. Cabernet Sauvignon, Malbec, or Syrah match the intensity. For lighter cuts, try Pinot Noir.
Storage & Reheating
Leftovers: Store in an airtight container for up to 3 days. The broiled crust softens when refrigerated but can be partially restored through reheating.
Reheating: Never microwave—it destroys texture. Bring steak to room temperature, then reheat under the broiler for 1-2 minutes per side. Watch constantly to prevent burning. Alternatively, warm gently in a 250°F oven for 10 minutes.
Creative Uses: Slice leftover broiled steak thinly for Philly cheesesteaks, steak salads, or grain bowls. The char flavor remains even when cold, making leftovers particularly delicious.
Frequently Asked Questions
Can I broil without a broiler pan?
- Yes. A cast iron skillet or heavy stainless steel pan works excellently and actually provides better heat retention than typical broiler pans. Avoid non-stick pans—they can’t handle broiler temperatures safely.
Why does my broiler smoke so much?
- Fat dripping onto the hot pan creates smoke. This is normal and unavoidable with fatty cuts like ribeye. Ensure good ventilation. Some cooks place a layer of foil on the bottom rack to catch drips, though this can create more smoke as drippings burn.
How close should the steak be to the broiler element?
- Start with 5-6 inches for your first attempt. If it takes longer than 6 minutes per side to develop char, move the rack closer next time. If it burns in 3 minutes, move it farther away. Every broiler is different.
Can I broil frozen steak?
- Not recommended. Frozen steak won’t develop proper crust before the interior overcooks. Thaw completely in the refrigerator, then bring to room temperature before broiling.
My steak charred on the outside but stayed raw inside—what went wrong?
- Your rack was too close to the broiler element. Move it 1-2 inches farther away next time. Alternatively, your steak was too cold when it started cooking. Always bring to room temperature first.
Conclusion
Mastering how to cook a steak in the oven using the broiler method opens up steakhouse-quality results regardless of your living situation or equipment limitations. The intense, focused heat creates genuine char and crisps fat in ways that gentle baking can’t match. Once you’ve dialed in your specific broiler’s quirks and timing, you’ll produce consistently impressive steaks.
The broiler method proves that great steak isn’t about expensive equipment—it’s about understanding heat application and working with what you have. Your oven’s broiler is more capable than you think.
Position that rack, preheat that broiler, and prepare for serious char. Your best oven-cooked steak awaits.
Rate this recipe and tell us your broiler tips in the comments!