Beef Gravy Recipe 3 Ways to Make It Without Drippings
This beef gravy recipe creates rich, savory gravy without requiring pan drippings. Build deep flavor by browning butter and flour into a dark roux, then whisk in beef broth enhanced with soy sauce, Worcestershire, and tomato paste for restaurant-quality results in just 15 minutes.
Ever perfectly roasted a beef tenderloin or grilled steaks only to realize you have no drippings for gravy? Standing there with mashed potatoes that desperately need sauce, you’re stuck with jarred gravy or plain butter.
This beef gravy recipe solves that frustrating situation completely. You’ll learn three reliable methods for creating deeply flavored, silky-smooth gravy using pantry staples and simple techniques—no roasting pan required.
The secret lies in building layers of flavor through the Maillard reaction in your roux, then amplifying beefiness with umami-rich ingredients like tomato paste and soy sauce. Proper whisking technique ensures lump-free, velvety texture that coats the back of a spoon beautifully.
Here is everything you need to know to master foolproof beef gravy without drippings.

Why This Beef Gravy Recipe is a Keeper
This versatile gravy delivers restaurant-quality flavor while offering maximum flexibility for any cooking situation.
No drippings required: Perfect for grilled steaks, store-bought rotisserie beef, or any meal where traditional pan drippings aren’t available.
Ready in 15 minutes: From cold stove to finished gravy faster than most side dishes cook. No waiting for roasts to finish.
Three proven methods: Classic roux-based, quick slurry version, and rich reduction style. Choose based on your time and preference.
Pantry-friendly ingredients: Uses shelf-stable items you likely already own. No emergency grocery runs for obscure ingredients.
Infinitely adaptable: Adjust thickness, intensity, and seasoning to complement any beef dish from casual burgers to elegant prime rib.
Make-ahead friendly: Prepare days in advance and reheat gently. Actually improves as flavors meld.
Budget-conscious: Costs pennies compared to jarred gravy, with dramatically better flavor and no preservatives.
Understanding Beef Gravy Components (Instead of “Best Cut”)
Building Umami Without Meat
Since this beef gravy recipe doesn’t rely on drippings, understanding flavor-building ingredients becomes crucial. Traditional gravy gets richness from rendered fat and fond (browned bits) left in the roasting pan. Without those, you must create depth through strategic ingredient selection.
Beef broth or stock forms your liquid base. Stock made from bones contains more gelatin, creating superior body and mouthfeel. Store-bought beef broth works perfectly fine—choose low-sodium versions to control saltiness.
Tomato paste contributes glutamates (natural MSG) and adds subtle sweetness that balances savory notes. Just one tablespoon makes remarkable difference.
Soy sauce amplifies beefy flavor through fermented umami. It won’t make gravy taste Asian—it simply enhances meatiness the way salt enhances sweetness in desserts.
Worcestershire sauce adds complex fermented depth with its blend of anchovies, tamarind, and spices. Essential for authentic beef gravy flavor.
Ingredient Quality Tips:
Look for beef broth with beef or beef stock listed as the first ingredient, not water. Better broth means better gravy—this isn’t the place to economize.
Choose unsalted butter for your roux. Salted butter makes controlling final seasoning difficult, risking over-salted gravy.
Keep dried herbs like thyme and rosemary on hand. They infuse during simmering, adding aromatic complexity that mimics roasted meat essence.
Ingredients Notes & Preparation
Roux Foundation:
Equal parts butter and all-purpose flour create your thickening base. The ratio is always 1:1 by weight, but measuring by volume works: 4 tablespoons butter to 4 tablespoons flour.
Cook your roux longer than you think necessary. Pale roux tastes like raw flour. A golden-to-brown roux develops nutty, toasted flavors that add dimension.
Constant whisking prevents burning and ensures even color development. No multitasking during roux-making—it demands your full attention.
Liquid Components:
Beef broth should be warm or room temperature before adding to your roux. Cold liquid hits hot roux and creates instant lumps that are nearly impossible to smooth out.
Red wine (optional but recommended) adds acidity and complexity. Use something you’d actually drink—cooking wine tastes terrible and makes terrible gravy.
Flavor Enhancers:
One tablespoon of tomato paste, browned in the pan before adding flour, contributes incredible depth. This step takes 60 seconds and transforms mediocre gravy into memorable sauce.
Fresh cracked black pepper beats pre-ground by miles. Grind it directly into your gravy for maximum aromatic impact.
Equipment:
Heavy-bottomed saucepan (2-3 quart capacity) distributes heat evenly and prevents scorching.
Wire whisk—preferably balloon-style for maximum liquid incorporation and lump prevention.
Fine-mesh strainer for silky-smooth texture if desired.
Rubber spatula for scraping every drop from the pan.
Step-by-Step Instructions
Recipe Card
🛠 Equipment Needed
- 2-3 quart heavy-bottomed saucepan
- Wire whisk (balloon-style preferred)
- Fine-mesh strainer (optional but recommended)
- Measuring cups and spoons
- Rubber spatula
- Small mixing bowl (for slurry method)
Method 1: Classic Roux-Based Gravy
Melt 4 tablespoons of butter in your saucepan over medium heat until foaming. Add 1 tablespoon tomato paste and cook for 1 minute, stirring constantly, until it darkens slightly.
Sprinkle in 4 tablespoons of flour. Whisk immediately to combine completely with the butter-tomato mixture. No dry flour pockets should remain.
Continue cooking and whisking for 4-5 minutes. Your roux will progress from pale yellow to golden tan to light caramel brown. You’re looking for a color similar to peanut butter. You’ll smell toasted, nutty aromas.
Slowly pour in 2 cups of warm beef broth while whisking vigorously. Add it gradually—rushing creates lumps. The mixture will seize up initially, then smooth out as you continue whisking.
Add 1 tablespoon Worcestershire sauce, 1 teaspoon soy sauce, ½ teaspoon dried thyme, and a bay leaf. Bring to a gentle simmer.
Reduce heat to low and cook for 8-10 minutes, whisking occasionally. The gravy will thicken noticeably and develop a glossy sheen. Remove the bay leaf.
Taste and season with salt and fresh black pepper. Remember, the gravy concentrates flavor, so season conservatively.
Method 2: Quick Slurry Gravy
Heat 2 cups beef broth in a saucepan with 1 tablespoon tomato paste, 1 tablespoon Worcestershire sauce, and 1 teaspoon soy sauce. Bring to a simmer.
In a small bowl, whisk together 3 tablespoons cornstarch with 3 tablespoons cold water until completely smooth with no lumps.
Slowly drizzle the cornstarch slurry into the simmering broth while whisking constantly. The gravy will thicken within 30 seconds.
Simmer for 2-3 minutes, whisking occasionally. This cooks out the starchy taste and allows flavors to meld.
Finish with 2 tablespoons of cold butter whisked in off the heat. This adds richness and creates that restaurant-quality glossy finish.
Method 3: Reduction-Style Rich Gravy
Combine 3 cups beef broth, ½ cup red wine, 2 tablespoons tomato paste, 2 tablespoons Worcestershire sauce, 1 tablespoon soy sauce, fresh thyme sprigs, and a bay leaf in a saucepan.
Bring to a vigorous boil over high heat, then reduce to medium-high. Maintain a steady simmer that produces constant small bubbles.
Cook for 15-20 minutes until reduced by half. The liquid will become noticeably darker and more concentrated. Stir occasionally to prevent scorching.
Strain out the herbs. Whisk in 2 tablespoons of cold butter cut into small cubes, one piece at a time. This technique, called mounting with butter, creates luxurious body without flour.
Season with salt and pepper. This method produces the most intensely flavored gravy with the cleanest taste.
Thickness Adjustment Guide
Too thin: Simmer longer to reduce, or whisk in a slurry of 1 tablespoon cornstarch mixed with 1 tablespoon cold water.
Too thick: Whisk in warm beef broth 2 tablespoons at a time until desired consistency is reached.
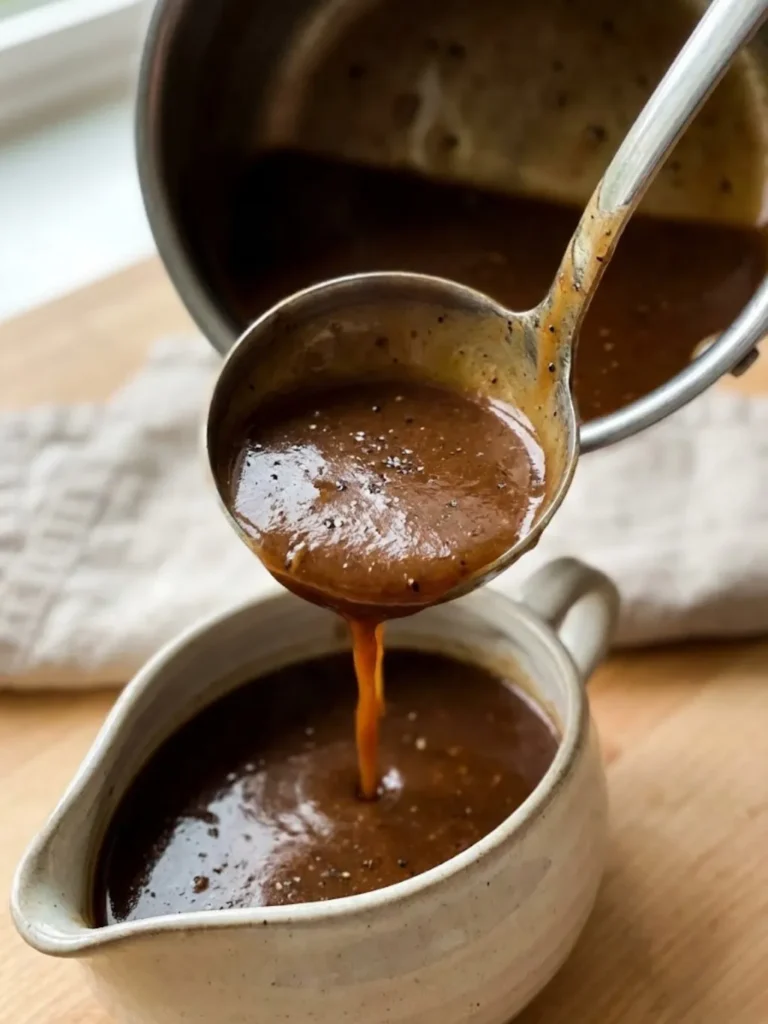
Perfect consistency: Coats the back of a spoon and slowly drips off rather than running off in a stream. When you draw your finger through it on the spoon, the line should hold for 2-3 seconds before filling in.
Why Straining Matters (The “Resting” Equivalent)
Unlike beef that needs resting, gravy benefits from straining. Pour finished gravy through a fine-mesh strainer into a clean vessel.
This removes any flour lumps, herbs, or skin that formed during cooking. The result is perfectly silky texture that looks professional.
Straining takes 30 seconds but elevates presentation from homemade to restaurant-quality. Don’t skip this step if you’re serving guests.
Expert Tips for Perfect Gravy Every Time
Tip 1: Temperature control is crucial.
Keep your heat moderate when making roux-based gravy. Too high and the flour burns before developing flavor. Too low and you’ll wait forever for proper color. Medium heat is the sweet spot.
Tip 2: Warm your broth.
Adding cold liquid to hot roux creates lumps and temperature shock that can break your emulsion. Microwave broth for 90 seconds or let it sit out while you make the roux. This simple step prevents most gravy disasters.
Tip 3: Whisk in one direction.
Consistent whisking motion in the same direction creates smoother gravy than random back-and-forth movements. Professional chefs use circular or figure-eight patterns for lump-free results.
Tip 4: Taste and adjust.
Gravy concentrates during cooking, so under-season initially. Add salt and pepper in small increments, tasting after each addition. You can always add more but you can’t remove it.
Tip 5: Use the right thickener for your timeline.
Flour-based roux requires longer cooking to eliminate raw flour taste but has the best flavor. Cornstarch slurries work instantly but can taste slightly starchy if not simmered adequately. Reduction requires time but produces the purest flavor.
Serving Suggestions & Pairings
Classic Pairings:
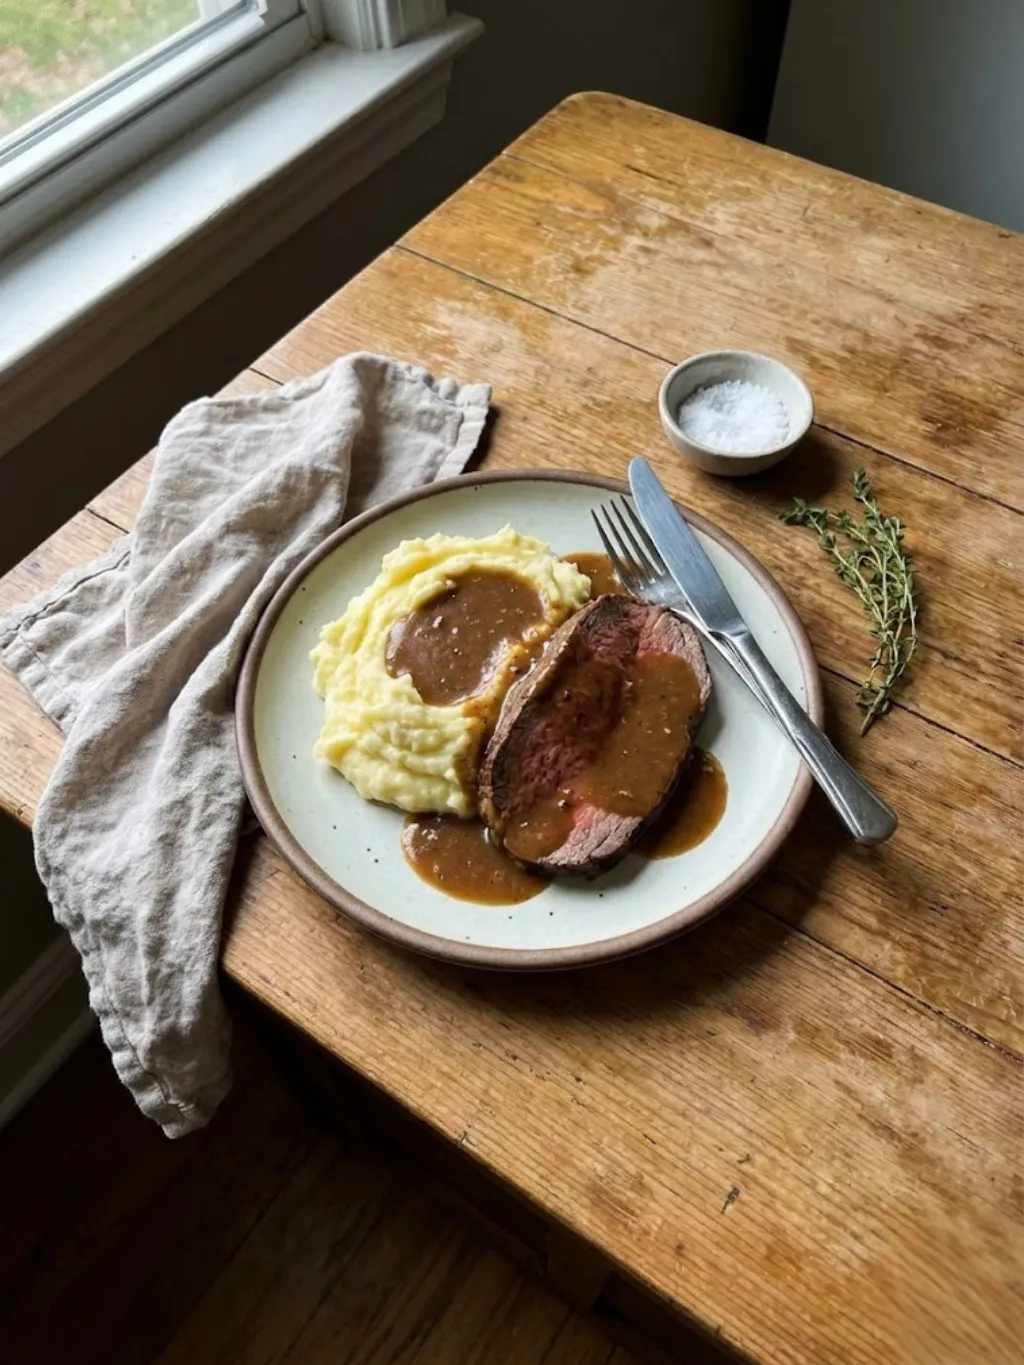
Pour over mashed potatoes for the ultimate comfort food combination. The creamy potatoes soak up gravy like a sponge.
Drizzle over sliced roast beef or grilled ribeye. Even perfectly cooked beef benefits from rich, savory gravy.
Serve alongside Yorkshire pudding for traditional Sunday roast presentation. The pudding’s cupped shape holds gravy perfectly.
Creative Applications:
Use as a base for shepherd’s pie or cottage pie. Better than plain meat sauce and adds incredible depth.
Transform leftover pot roast into beef manhattans—open-faced sandwiches smothered in gravy.
Enhance beef stroganoff by replacing sour cream with this gravy for a different flavor profile.
Vegetable Matches:
Roasted root vegetables—carrots, parsnips, turnips—pair beautifully. The gravy’s richness complements their natural sweetness.
Steamed green beans or asparagus benefit from a light gravy drizzle for added interest.
Storage, Freezing & Reheating
Fridge Life:
Store gravy in an airtight container for up to 5 days. Cool to room temperature before refrigerating, but don’t leave out longer than 2 hours.
Gravy thickens considerably when cold. This is normal—it will thin again when reheated.
Pour a thin layer of plastic wrap directly on the gravy’s surface before covering the container. This prevents skin formation.
Freezing:
Freeze gravy for up to 3 months in freezer-safe containers or heavy-duty freezer bags. Leave 1 inch of headspace for expansion.
Label with date and contents. Frozen brown liquids all look identical after a month.
Roux-based gravies freeze better than cornstarch-thickened versions, which can separate upon thawing.
Reheating:
Stovetop method (best): Transfer to a saucepan over low heat. Whisk frequently as it warms. Add beef broth or water by the tablespoon if it seems too thick. Don’t rush this—high heat can break the emulsion.
Microwave method: Heat in 30-second intervals at 50% power, whisking between each session. Add a splash of broth if needed.
From frozen: Thaw overnight in the refrigerator for even reheating, or reheat from frozen over very low heat, stirring constantly as it melts.
Frequently Asked Questions
Can I make beef gravy recipe without flour or cornstarch?
Yes, use the reduction method detailed above. Simmer beef broth with flavor enhancers until reduced by half, then mount with butter for body. Alternatively, add a small amount of unflavored gelatin bloomed in cold water—it provides thickness without starch.
Why does my gravy have lumps even though I whisked?
Lumps form when cold liquid hits hot roux, when you add liquid too quickly, or when flour isn’t fully incorporated initially. To fix lumpy gravy, pour it through a fine-mesh strainer or blend with an immersion blender for 30 seconds.
How do I make this beef gravy recipe gluten-free?
Replace all-purpose flour with rice flour or gluten-free flour blend using the same measurements. Alternatively, use cornstarch slurry method (naturally gluten-free) or the reduction method which contains no thickener at all. Always verify your beef broth is gluten-free.
Can I make beef gravy ahead of time?
Absolutely. This is one of the best make-ahead components for holiday meals. Prepare gravy up to 3 days in advance and reheat gently before serving. The flavors actually improve as they meld, making advance preparation preferable to last-minute cooking.
Conclusion
This beef gravy recipe proves you never need to settle for bland, store-bought gravy again. Whether you’re working with a simple weeknight steak or planning an elaborate holiday feast, these three methods ensure you always have rich, flavorful sauce.
The versatility of making gravy without drippings means you can elevate any beef dish, any day of the week. Master these techniques and you’ll wonder why you ever felt limited by traditional dripping-based recipes.
Transform your next beef dinner with this reliable beef gravy recipe. Rate this recipe and share your photos on Pinterest! I’d love to see which method became your go-to favorite.