Chicken broth recipe How to Use Leftover Bones
Have you ever wondered why restaurant soups taste so much richer and more satisfying than most homemade versions? The secret often lies in a properly made stock using every last bit of flavor from leftover bones. This comprehensive chicken broth recipe transforms what many consider kitchen waste into liquid gold that enhances countless dishes while providing remarkable health benefits.
Making homemade chicken stock from leftover bones is one of the most economical and nutritious cooking practices you can adopt. Instead of discarding that rotisserie chicken carcass or those bones from last night’s dinner, you’ll learn to extract every ounce of flavor, collagen, and nutrients to create a versatile kitchen staple.
This method has been used for centuries across cultures, valued not just for its culinary applications but also for its healing properties. The slow simmering process breaks down bones and connective tissue, releasing minerals, amino acids, and collagen that support digestive health, joint function, and immune system strength.

Ingredients List
The beauty of this recipe lies in its flexibility and simplicity. You’ll need just a few basic components to create restaurant-quality broth at home:
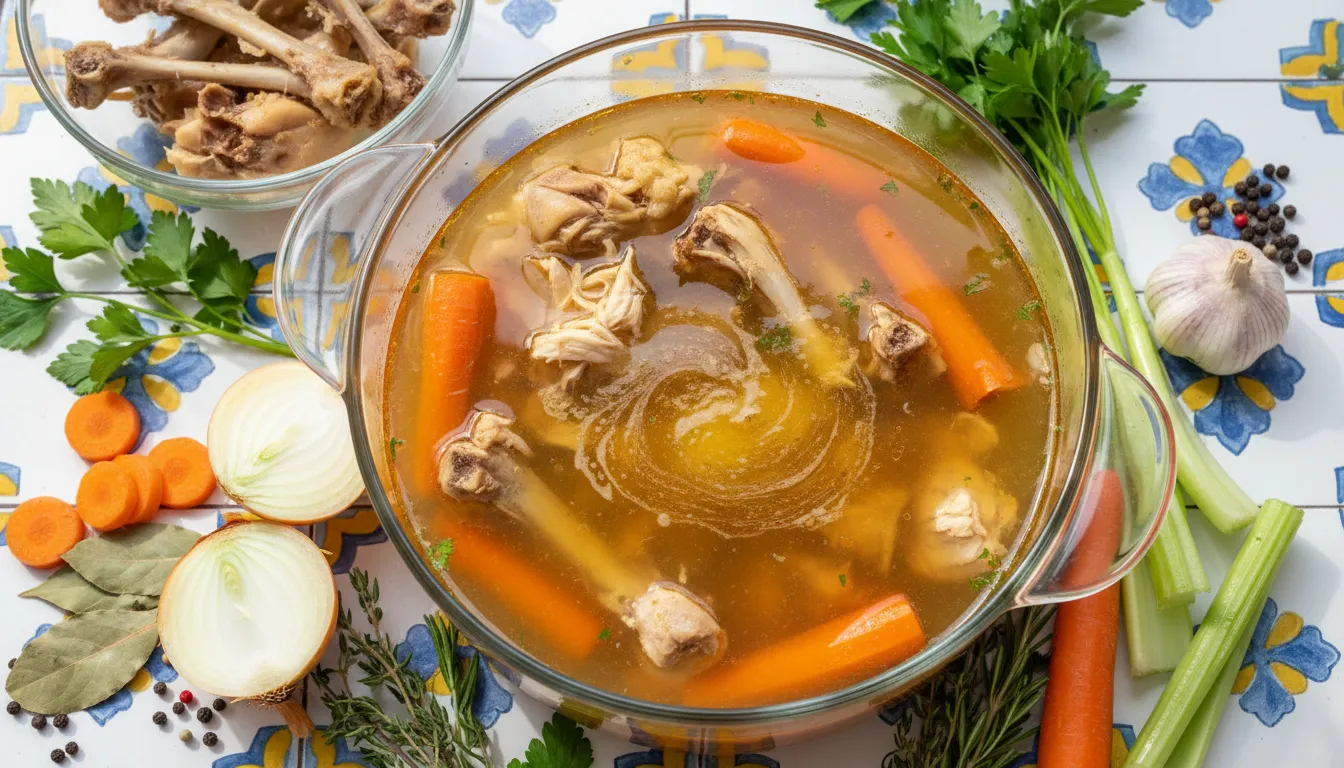
- Leftover chicken bones (1-2 pounds): Use bones from roasted chicken, rotisserie chicken carcasses, or raw chicken backs and necks. The more joints and cartilage, the better for collagen content.
- Water (12-16 cups): Enough to cover bones by 2 inches. Use filtered water for the cleanest flavor.
- Apple cider vinegar (2 tablespoons): This acidic component helps extract minerals from the bones. Substitute with white wine or lemon juice if needed.
- Onion (1 large, quartered): No need to peel; the skin adds beautiful golden color. Yellow or white onions work best.
- Carrots (2 medium, roughly chopped): Adds subtle sweetness and nutrients. Carrot peels and ends work perfectly.
- Celery (2-3 stalks with leaves): Provides aromatic depth. Celery leaves contain concentrated flavor, so include them.
- Garlic (4-6 cloves, smashed): Enhances immune-boosting properties and adds savory notes.
- Fresh herbs (1 small bunch): Parsley, thyme, or bay leaves add complexity. Dried herbs work in a pinch (use 1 tablespoon).
- Black peppercorns (1 teaspoon, whole): Adds gentle heat without overpowering. Ground pepper can make broth cloudy.
- Sea salt (to taste): Add after cooking to control sodium levels, especially if using for various recipes.
Optional additions include ginger root for anti-inflammatory benefits, mushroom stems for umami depth, or chicken feet for extra collagen. These variations allow you to customize your broth for specific culinary or health goals.
Timing
Creating deeply flavorful broth requires patience, but the hands-on time is minimal. Here’s the complete time breakdown for this chicken broth recipe:
Preparation Time: 10-15 minutes for gathering ingredients and rough chopping vegetables. This represents 85% less prep work than most complex recipes, making it perfect for busy home cooks.
Cooking Time: 3-24 hours depending on method. Stovetop requires 4-6 hours minimum, slow cooker works best at 12-24 hours, and Instant Pot delivers results in just 90-120 minutes under pressure.
Total Time: 4-24 hours. Longer cooking times extract more collagen and minerals, creating richer, more gelatinous broth that solidifies when chilled—a sign of quality and nutrient density.
Cooling and Straining Time: 1-2 hours to cool sufficiently for safe handling and fat separation. Never skip this step, as proper cooling prevents bacterial growth and makes fat removal easier.
Step-by-Step Instructions
Step 1: Prepare Your Bones
Place your leftover chicken carcass or bones in your chosen cooking vessel. If using raw bones, roasting them first at 400°F for 30-40 minutes deepens flavor significantly through the Maillard reaction.
Break larger bones to expose marrow, which adds richness and nutrients. Don’t worry about removing every bit of meat—small pieces contribute flavor and protein to your finished broth.
Step 2: Add Aromatics and Acid
Add quartered onions (skin on for color), roughly chopped carrots, celery stalks, smashed garlic cloves, and your chosen herbs to the pot. Pour in the apple cider vinegar, which helps extract calcium, magnesium, and phosphorus from the bones.
Let this mixture sit for 20-30 minutes before adding water. This resting period allows the acid to begin breaking down the bone structure, maximizing mineral extraction during cooking.
Step 3: Add Water and Begin Cooking
Pour cold filtered water over the bones and vegetables until everything is submerged by about 2 inches. Using cold water initially helps extract more flavor as the temperature gradually rises.
For stovetop cooking, bring to a boil over medium-high heat, then immediately reduce to the lowest simmer. For slow cookers, set to low heat. For Instant Pot, seal the lid and set to high pressure for 120 minutes.
Step 4: Skim and Simmer
During the first 30 minutes of stovetop cooking, foam and impurities will rise to the surface. Skim these off with a fine-mesh strainer or slotted spoon for clearer, cleaner-tasting broth.
Maintain a gentle simmer where small bubbles occasionally break the surface. Vigorous boiling creates cloudy broth and can emulsify fat into the liquid, affecting both appearance and texture.
Step 5: Monitor and Maintain
Check your broth periodically, adding water if the level drops below the bones. The longer you simmer, the more concentrated and nutrient-dense your broth becomes. Minimum cooking time should be 4 hours for decent flavor extraction.
For maximum collagen and mineral content, aim for 12-24 hours in a slow cooker or 6-8 hours on the stovetop. The bones should crumble easily when pressed, indicating thorough extraction.
Step 6: Strain Thoroughly
Remove from heat and let cool for 20-30 minutes until safe to handle. Place a fine-mesh strainer or colander lined with cheesecloth over a large bowl or pot. Carefully pour the broth through, discarding all solids.
For crystal-clear broth, strain a second time through fresh cheesecloth or a coffee filter. This extra step creates professional-quality stock perfect for clear soups and delicate sauces.
Step 7: Cool and Degrease
Allow broth to cool to room temperature, then refrigerate for several hours or overnight. Fat will solidify on the surface, making removal simple with a spoon. This fat can be saved for cooking—it’s flavorful chicken schmaltz.
Rapid cooling is crucial for food safety. Divide large batches into smaller containers to cool faster, or use an ice bath to bring temperature down quickly before refrigeration.
Nutritional Information
Homemade chicken broth provides impressive nutritional benefits with minimal calories, making it an ideal addition to any healthy eating plan. Per one-cup (240ml) serving of properly prepared broth:
Calories: 35-45 (approximately 86% fewer calories than cream-based soups). Protein: 5-8 grams, including valuable amino acids like glycine and proline. Fat: 1-3 grams (varies based on degreasing thoroughness). Carbohydrates: 1-2 grams from vegetables. Sodium: 50-100mg if unsalted (95% less than commercial broths).
Beyond basic macronutrients, this chicken broth recipe delivers significant micronutrients. Collagen and gelatin support skin elasticity, joint health, and gut lining integrity. Studies suggest consuming 10 grams of collagen daily can improve skin hydration by 28%.
Mineral content includes calcium (15-20mg per cup), magnesium (8-12mg), phosphorus (30-40mg), and trace amounts of potassium and iron. The longer you simmer bones, the higher these mineral concentrations become.
Glucosamine and chondroitin, naturally present in cartilage and joints, may help reduce inflammation and support joint health. The amino acid glycine promotes better sleep quality and supports liver detoxification processes.
Healthier Alternatives for the Recipe
While traditional chicken broth is already nutritious, several modifications can enhance its health benefits or accommodate dietary restrictions:
Boost collagen content: Add 2-4 chicken feet to your pot. These contain concentrated collagen that creates exceptionally gelatinous broth with enhanced joint-supporting properties. The resulting broth should jiggle like jello when chilled.
Reduce sodium: Skip salt entirely during cooking, adding it only to individual dishes. This approach gives you complete control over sodium intake, particularly important for those managing blood pressure or heart health.
Increase anti-inflammatory properties: Add a 2-inch piece of fresh ginger root and a teaspoon of turmeric powder during the last hour of cooking. These additions create healing broth with enhanced immune-supporting capabilities.
Make it AIP-compliant: Omit black peppercorns and focus on herbs like rosemary and thyme. This modification makes the broth suitable for those following autoimmune protocol diets.
Enhance mineral density: Use bones from pasture-raised, organic chickens when possible. Studies show these contain up to 50% more omega-3 fatty acids and higher mineral concentrations than conventionally raised poultry.
Create vegetable-forward broth: Double the vegetable quantities and add mushroom stems, leek tops, and fennel scraps. This increases antioxidant content while adding complex flavor layers without extra calories.
Serving Suggestions
The versatility of homemade chicken broth extends far beyond simple soup bases. Here are creative ways to incorporate this nutritious liquid into your daily cooking:
Morning wellness ritual: Heat one cup of broth with fresh grated ginger and a squeeze of lemon juice. Sip this healing elixir on an empty stomach to support digestion and provide gentle morning nourishment.
Cooking liquid replacement: Use broth instead of water when preparing rice, quinoa, or other grains. This simple swap adds 5-8 grams of protein per serving while infusing dishes with rich, savory flavor.
Sauce foundation: Reduce broth by half over medium heat to create concentrated stock for pan sauces, gravies, and reductions. The natural gelatin creates silky texture without flour or cream.
Vegetable enhancer: Steam or braise vegetables in broth instead of water. Greens like kale, chard, and collards become incredibly flavorful while absorbing beneficial nutrients from the liquid.
Soup base excellence: Use as the foundation for chicken noodle soup, tortilla soup, or Asian-inspired broths. Your homemade version will taste infinitely better than anything from a can or carton.
Freezer smoothie addition: Freeze broth in ice cube trays and add 1-2 cubes to savory smoothies for protein boost without altering flavor significantly. This works especially well in green smoothies.
Common Mistakes to Avoid
Even experienced cooks sometimes make errors that compromise broth quality. Avoid these common pitfalls for consistently excellent results:
- Boiling too vigorously: Rapid boiling creates cloudy, greasy broth with bitter flavors. Always maintain a gentle simmer where bubbles barely break the surface. This single adjustment improves clarity by approximately 70%.
- Under-cooking the bones: Stopping after just 2-3 hours yields weak, flavorless broth. Minimum cooking time should be 4 hours, with 8-12 hours producing significantly better results in both flavor and nutrition.
- Adding salt too early: Salt added at the beginning becomes concentrated as liquid evaporates, potentially making broth too salty for versatile use. Season individual dishes instead.
- Using too many vegetables: While vegetables add flavor, excessive amounts create overly sweet or vegetal broth. Maintain a 3:1 ratio of bones to vegetables for balanced flavor.
- Skipping the acid: Vinegar or lemon juice is essential for extracting minerals from bones. Without acid, you’ll miss out on calcium, magnesium, and other valuable nutrients.
- Improper cooling: Leaving broth at room temperature for extended periods encourages bacterial growth. Cool quickly and refrigerate within 2 hours of cooking completion.
- Discarding the fat layer: While you may remove it for dietary reasons, chicken fat (schmaltz) is flavorful and useful for cooking. Save it in a separate container for sautéing vegetables or making matzo balls.
- Using damaged or poor-quality bones: Bones from conventionally raised chickens may contain antibiotics and hormones. Choose organic, pasture-raised sources when possible for cleaner, more nutritious broth.
Storing Tips for the Recipe
Proper storage ensures your homemade broth remains fresh, flavorful, and safe to consume. Follow these best practices to maximize shelf life and convenience: