Easy chicken tenders recipe: Best Crispy Baked Strips
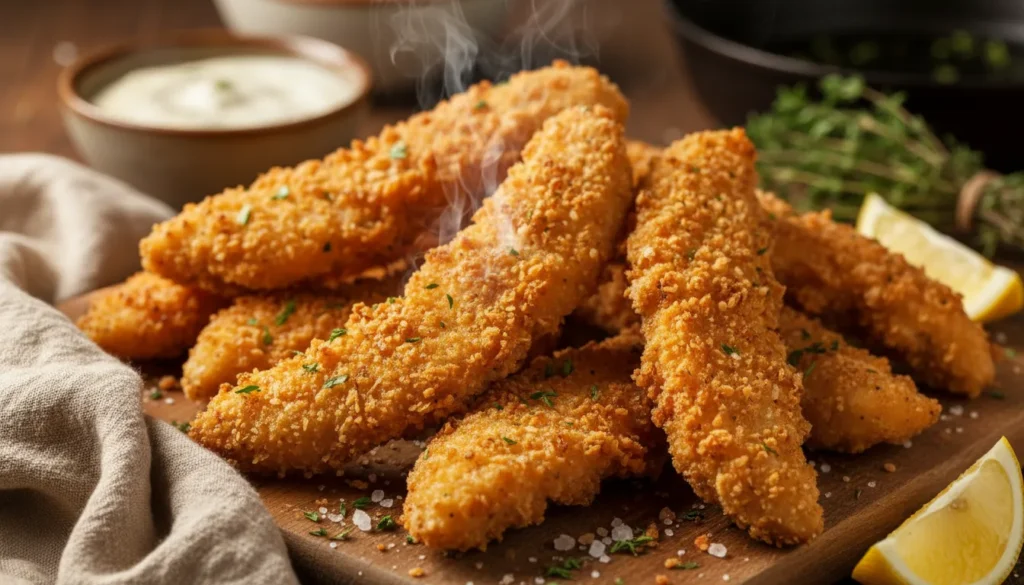
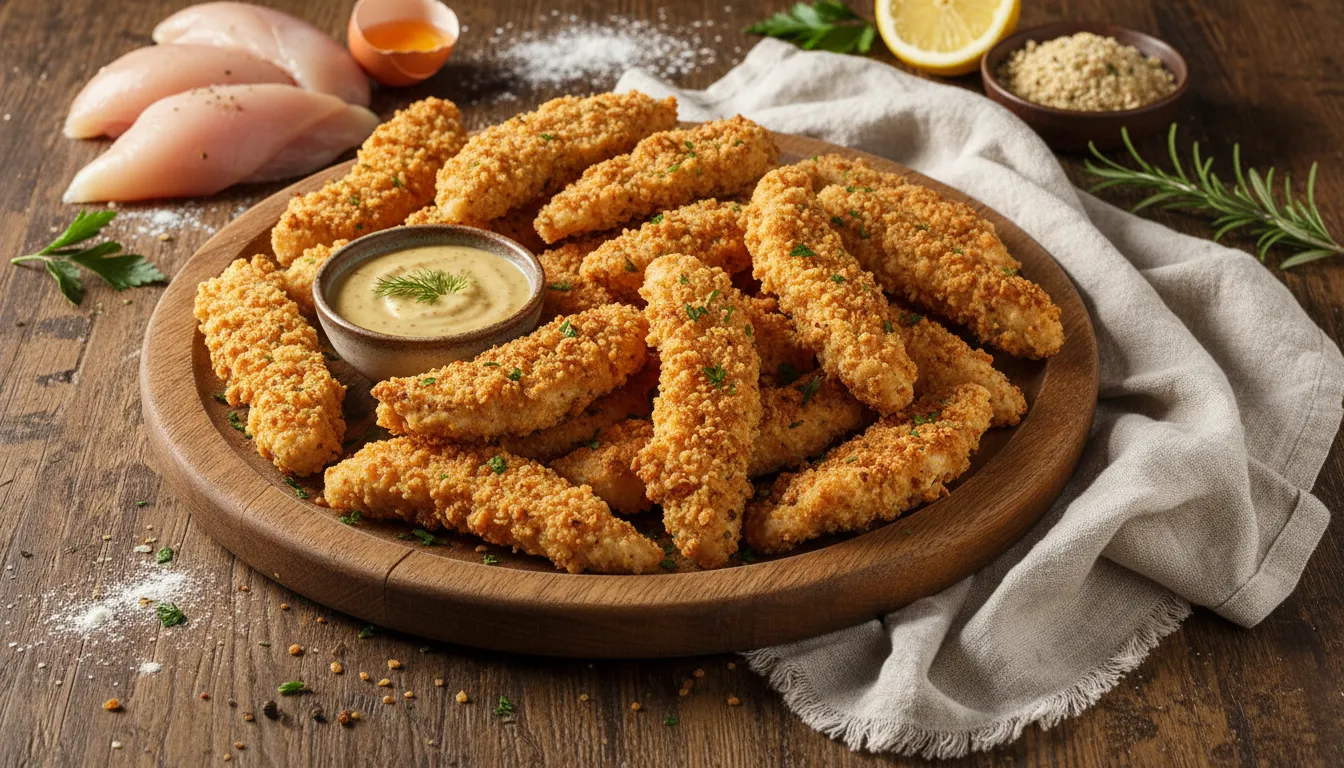
This easy chicken tenders recipe delivers crispy, golden strips in just 25 minutes with only 5 ingredients: chicken tenders, flour, eggs, panko breadcrumbs, and seasoning. Bake instead of fry for healthier, mess-free tenders that taste just like the restaurant version—no deep fryer or greasy cleanup required.
It’s Wednesday night. The kids are chanting “chicken nuggets,” you’re too tired to deal with splattering oil, and the drive-thru line is 15 cars deep. The frozen nuggets in your freezer are mystery meat at best, and you deserve better than that.
Here’s your solution: crispy baked chicken tenders that rival any fast-food version. This easy chicken tenders recipe skips the deep fryer mess entirely, uses just 5 basic ingredients, and delivers perfectly crispy strips in 25 minutes—faster than getting everyone buckled for a drive-thru run.
If weeknight cooking feels like an endless battle, our ultimate guide to quick easy meals has dozens more family-friendly recipes that won’t drain your last bit of energy.
The secret? Panko breadcrumbs and a hot oven create that signature crunch without a single drop of frying oil. No splatter guards, no grease disposal, no smoke detector going off.
Skip the drive-thru line. We’re making restaurant-quality chicken tenders in your oven right now.
Why This Easy Chicken Tenders Recipe is a Weeknight Lifesaver
- Just 5 ingredients – Chicken, flour, eggs, panko, and basic seasonings you already own
- 25 minutes total – Faster than waiting in the drive-thru
- Baked, not fried – Healthier, no oil cleanup, no grease smell lingering for days
- One pan cleanup – Line with parchment, toss the paper, done
- Kid-approved guaranteed – Crispy outside, juicy inside, zero complaints
- Meal prep champion – Make a double batch, freeze extras for instant dinners
- Customizable seasoning – Plain for picky eaters, spicy for adults
- Cheaper than takeout – $8 makes enough for the whole family vs. $25+ for fast food
Ingredients & Swaps for Easy Chicken Tenders Recipe
The Basics: This recipe uses pantry staples and fresh chicken tenders (the most expensive ingredient at about $6 per pound, but still cheaper than takeout).
Flexible Swaps:
- No chicken tenders? Cut chicken breasts into 1-inch strips using kitchen shears (faster than a knife). Thighs work too—even juicier.
- Out of panko? Regular breadcrumbs work but won’t be quite as crispy. Crushed cornflakes make an excellent crunchy alternative.
- Don’t have eggs? Buttermilk or plain Greek yogurt creates an even better coating adhesion.
- Want gluten-free? Use gluten-free flour and crushed gluten-free rice cereal instead of panko.
- No cooking spray? Drizzle 2 tablespoons melted butter or olive oil over the coated tenders before baking.
- Prefer spicy? Add cayenne pepper or hot sauce to the egg mixture. Kids eat plain, adults eat spicy.
Ingredients List
| Quantity | Ingredient |
|---|---|
| 1.5 lbs | Chicken tenderloins (about 10-12 pieces) |
| 1/2 cup | All-purpose flour |
| 2 large | Eggs |
| 1.5 cups | Panko breadcrumbs |
| 1 teaspoon | Garlic powder |
| 1 teaspoon | Paprika |
| 1/2 teaspoon | Salt |
| 1/4 teaspoon | Black pepper |
| Cooking spray | For the pan |
Ingredient Notes: The Easy Chicken Tenders Recipe Essentials
Chicken Tenderloins: The tender strip that runs along the chicken breast—nature’s perfect finger food shape. No trimming, no cutting, just season and coat. If your store doesn’t label them separately, ask the butcher or cut chicken breasts into strips yourself with kitchen shears (30 seconds, much faster than a knife).
Panko Breadcrumbs: The secret to restaurant-level crispiness. Japanese-style panko has larger, flakier crumbs that create more surface area and crunch than regular breadcrumbs. According to The USDA’s safe minimum cooking temperatures, chicken should reach 165°F internally—baking ensures even cooking throughout.
All-Purpose Flour: Creates the base layer that helps the egg stick, which helps the breadcrumbs stick. This three-step breading process (flour, egg, panko) is the foundation of all great crispy coatings.
Eggs: The glue that holds everything together. Room temperature eggs coat more smoothly, but cold eggs work fine—just whisk them thoroughly to break up the thick whites.
Garlic Powder & Paprika: The dynamic duo of easy seasoning. Garlic powder adds savory depth; paprika adds subtle sweetness and that golden color. Both are pantry staples that transform bland into delicious.
Cooking Spray: The final touch that turns baked into crispy. A light mist of oil on top helps the panko brown and crisp up in the oven, mimicking the effect of deep frying without the mess.
Step-by-Step Instructions for Easy Chicken Tenders Recipe
Recipe Card
🛠 Equipment Needed
- Baking sheet
- parchment paper
- 3 shallow bowls
- cooking spray
- wire rack (optional)
Prep: Set Up Your Assembly Line (5 minutes)
Preheat oven to 425°F. High heat is crucial for crispy baked chicken. Lower temps = soggy sadness.
Line a baking sheet with parchment paper and spray lightly with cooking spray. This is non-negotiable for easy cleanup and preventing sticking.
Set up three shallow bowls (or pie plates) in a row:
- Bowl 1: Flour + salt + black pepper
- Bowl 2: Beaten eggs (whisk until uniform yellow)
- Bowl 3: Panko + garlic powder + paprika (mix well)
Pat chicken tenders dry with paper towels. Dry chicken = better coating adhesion. This 30-second step prevents soggy breading.
The Method: Bread and Bake (15 minutes)
- Working with one tender at a time, dredge in flour mixture, coating all sides. Shake off excess.
- Dip in beaten egg, letting excess drip back into the bowl. Don’t over-egg it—you want a thin coat.
- Press into panko mixture, coating thoroughly. Press the breadcrumbs onto the chicken with your hands—passive dipping isn’t enough. You want full coverage.
- Place on prepared baking sheet with space between each tender (don’t crowd—air circulation = crispiness).
- Spray tops lightly with cooking spray once all tenders are on the sheet. This is the magic step that creates golden-brown perfection.
- Bake for 15-18 minutes, flipping halfway through at the 8-minute mark. They’re done when golden brown, crispy, and internal temp reaches 165°F.
The Shortcut: One-Handed Breading Technique
Keep one hand “dry” and one hand “wet.” Use your left hand for flour and panko (dry ingredients), right hand for egg (wet ingredient). This prevents the dreaded “club hand” where breading builds up on your fingers and you waste half the coating on your hands instead of the chicken.
Work in batches of 3-4 if your sheet is crowded. Better to bake two small batches than one overcrowded pan that steams instead of crisps.
Finish: The Crunch Test (2 minutes)
You’re done when: The coating is deep golden brown, the tenders feel firm when poked (not jiggly), and you can see a few spots of extra-crispy dark golden edges.
Let rest 3 minutes before serving. Hot chicken tenders straight from the oven are molten lava inside. Three minutes makes them perfect eating temperature and lets the coating set up even crispier.
3 Tips for Faster Cleanup
Tip 1: Parchment Paper is Mandatory. Line your baking sheet with parchment. After dinner, lift the paper, toss it, wipe the pan once. Done. Without parchment, you’ll be scrubbing baked-on egg and breadcrumbs for 10 minutes.
Tip 2: Disposable Gloves for Breading. Wear cheap disposable gloves during the breading process. When done, peel off gloves and your hands are clean. No sticky egg-flour paste under your nails.
Tip 3: Use a Wire Rack. Place a wire cooling rack ON the parchment-lined baking sheet. Chicken tenders sit elevated, air circulates underneath, and they crisp up on all sides without flipping. Bonus: even less cleanup.
Serving Suggestions for Easy Chicken Tenders Recipe
Instant Dipping Sauces:
- Honey mustard – Mix equal parts honey and Dijon mustard (30 seconds)
- BBQ sauce – Straight from the bottle
- Ranch – Store-bought or make your own (Greek yogurt + ranch seasoning packet)
- Buffalo sauce – Hot sauce + melted butter
- Sweet chili sauce – Asian section of the grocery store
Weeknight Sides That Match the Effort:
- Frozen french fries – Bake on a second sheet pan at the same time
- Bagged salad kit – Open, dump, toss with included dressing
- Baby carrots + ranch – Zero prep
- Mac and cheese – Boxed is perfectly acceptable
- Steamed broccoli – Microwave steam bag, 4 minutes
Make It a Meal:
- Slice and serve over salad (chicken Caesar salad)
- Stuff in a wrap with lettuce and ranch
- Make sliders with Hawaiian rolls and pickles
- Serve over rice with teriyaki sauce for an Asian-inspired bowl
Storage & Leftovers Strategy
Refrigerator: Store cooked tenders in an airtight container for 3-4 days. Reheat in a 375°F oven for 8-10 minutes to restore crispiness. Microwave makes them soggy—oven or toaster oven is the move.
Freezer:
- Before cooking: Bread the tenders, freeze on a sheet pan until solid, transfer to freezer bags. Bake from frozen, adding 5-7 minutes to cook time. Instant homemade frozen tenders.
- After cooking: Cool completely, freeze in a single layer, then bag. Reheat from frozen at 375°F for 10-12 minutes. Perfect for lunch boxes.
Meal Prep: Make a triple batch on Sunday. Some for dinner, some in the fridge for week lunches, some in the freezer for emergency dinners. Three meals from one cooking session.
Frequently Asked Questions About Easy Chicken Tenders Recipe
Why aren’t my tenders crispy?
Most common issues: (1) Didn’t spray the tops with oil, (2) Oven temp too low, (3) Overcrowded pan so they steamed instead of baked. Use 425°F, space them out, and always spray with cooking spray.
Can I use an air fryer instead?
Absolutely! Air fryer at 400°F for 10-12 minutes, flipping halfway. They’ll be even crispier with less oil. Don’t overcrowd the basket—work in batches.
My coating keeps falling off—help!
Pat chicken completely dry before breading. Make sure each layer is complete (don’t skip the flour). Press the panko on firmly with your hands. Let breaded tenders sit for 5 minutes before baking—this helps the coating “set.”
Can I make these dairy-free?
The recipe is already dairy-free! No milk, butter, or cheese involved. Just make sure your panko breadcrumbs don’t contain dairy (most don’t, but check labels).
Are baked tenders really as good as fried?
Different but equally delicious. Fried = heavier, greasier, richer. Baked = lighter, crispier crust, juicier inside. Plus you can eat three without feeling like you need a nap. Baked wins on convenience, health, and cleanup.
Conclusion
You just mastered the easy chicken tenders recipe that will become your go-to weeknight dinner, lunch box staple, and party appetizer. No more drive-thru guilt, no more mystery meat nuggets, no more expensive takeout.
Bookmark this recipe, make it this week, and watch it become a permanent rotation in your meal plan. Once you realize homemade tenders take 25 minutes and taste better than anything you can buy, there’s no going back.
For more family-friendly, actually-achievable weeknight recipes that save time and money, check out our complete guide to quick easy meals designed for busy, exhausted humans.
Saved your Wednesday night? Give this easy chicken tenders recipe 5 stars and share it with another parent who needs a dinner win!