Caramelized Peanuts Recipe Sweet & Salty Crunch!
Tired of store-bought candied nuts loaded with artificial ingredients and sky-high prices? There’s nothing quite like the disappointment of paying premium prices for peanuts that are either too sweet, burnt, or clumped together in an inedible mess.
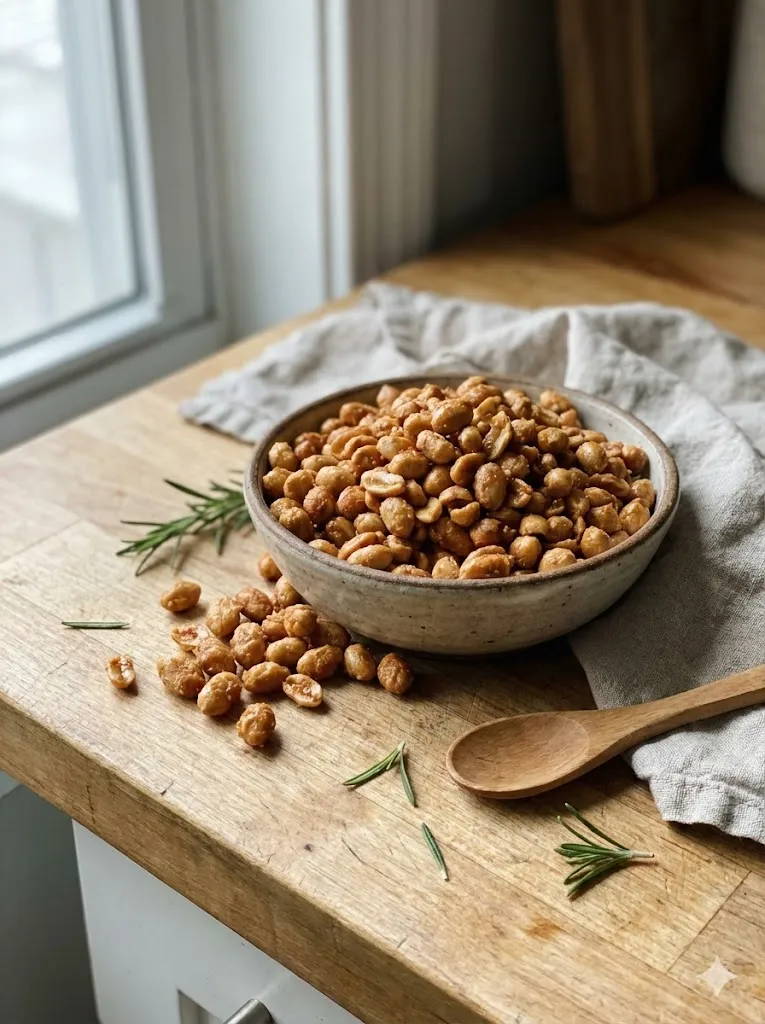
This caramelized peanut recipe delivers the perfect balance of sweet and salty crunch – with a glossy caramel coating that shatters with every bite, revealing perfectly roasted peanuts underneath. As someone who’s been crafting homemade candied nuts for family gatherings and holiday gifts for over a decade, I’ve perfected this foolproof method that works every single time.
In this guide, you’ll discover everything you need to know: how to select the best peanuts for caramelizing, the exact temperature to achieve that signature crackle, common mistakes to avoid, and creative flavor variations that will have everyone begging for your recipe. Whether you’re making these for a party snack, holiday gift, or midnight craving, you’re just 20 minutes away from nutty perfection.
Why This Caramelized Peanut Recipe Works
This isn’t your average candied nut recipe – it’s been tested, tweaked, and perfected to deliver consistent results with minimal effort.
- Uses just 5 simple ingredients you probably already have in your pantry
- Ready in under 20 minutes from start to finish, no candy thermometer required
- Creates the perfect sweet-salty balance that keeps you reaching for more
- Stays crunchy for weeks when stored properly, unlike soggy store-bought versions
- Incredibly versatile – perfect for snacking, gifting, salad toppings, or dessert garnishes
- Budget-friendly – costs a fraction of artisanal candied nuts at gourmet shops
- Customizable with endless flavor variations to suit any taste preference
Choosing the Right Peanuts
The foundation of exceptional caramelized peanuts starts with selecting the right type of peanut. Not all peanuts are created equal, and your choice will significantly impact the final texture and flavor.
Best Peanuts for Caramelizing
Raw, unsalted peanuts are the gold standard for this recipe. They allow you to control the salt level and ensure even caramelization without the interference of existing oils or seasonings. Raw peanuts also develop a deeper, more complex roasted flavor as they cook in the caramel.
Dry roasted peanuts work as a convenient alternative if raw peanuts aren’t available, though they may become slightly harder in texture. Choose unsalted varieties so you can control the sodium content.
Avoid oil-roasted or pre-salted peanuts, as they can prevent the caramel from adhering properly and may result in overly salty or greasy nuts.
Buying Tips
When shopping for peanuts, look for nuts that are uniform in size – this ensures even cooking and coating. Fresh peanuts should have a clean, nutty aroma without any musty or rancid smell.
Check the expiration date or ask your grocer about turnover rates. Nuts contain oils that can go rancid, so fresher is always better. If buying in bulk, give them a sniff test – they should smell pleasantly nutty, not bitter or paint-like.
Choose whole peanuts over halves or pieces for the best texture and presentation. Broken pieces can burn more easily during caramelization.
Substitutions
Can’t find raw peanuts or want to experiment? Here are some excellent alternatives:
Cashews create an ultra-buttery caramelized treat with a softer crunch. Reduce cooking time by 1-2 minutes as they’re more delicate.
Almonds offer a firmer bite and work beautifully with the same method. Their subtle flavor pairs particularly well with cinnamon or vanilla variations.
Pecans are perfect for a more indulgent, dessert-like version. Their natural richness complements the caramel beautifully.
Mixed nuts create an exciting variety of textures and flavors in every handful – just ensure all nuts are roughly the same size for even cooking.
Ingredients & Prep
Success with caramelized peanuts comes down to proper preparation and using quality ingredients in the right proportions.
Essential Ingredients
For the peanuts:
- 2 cups raw, unsalted peanuts
- 1 cup granulated sugar
- ¼ cup water
- 2 tablespoons unsalted butter
- 1 teaspoon sea salt (adjust to taste)
- ½ teaspoon vanilla extract (optional, but recommended)
Prep Essentials
Before you begin cooking, set yourself up for success with these preparation steps:
Line a large baking sheet with parchment paper or a silicone baking mat and set it near your stove. Once the caramel is ready, you’ll need to work quickly, so having everything in place is crucial.
Measure all ingredients in advance and have them within arm’s reach. Caramel waits for no one – if you’re scrambling to measure butter while your sugar burns, disaster awaits.
If using raw peanuts, you can lightly toast them in a dry skillet for 2-3 minutes over medium heat before adding them to the caramel. This extra step intensifies their flavor, though it’s entirely optional.
Pantry Staples & Tools
Beyond the main ingredients, you’ll need a few kitchen essentials:
Heavy-bottomed saucepan or skillet (at least 10 inches) – this distributes heat evenly and prevents hot spots that can burn your caramel.
Wooden spoon or heat-resistant silicone spatula for stirring – metal spoons can get dangerously hot.
Baking sheet with parchment paper for spreading the finished nuts.
Two forks or a spatula for separating the peanuts as they cool, preventing them from forming one giant cluster.
Step-by-Step Cooking Instructions
Follow these detailed instructions for perfect caramelized peanuts every time. Precision matters when working with caramel, so read through all steps before beginning.
Pre-Cooking Prep
Start by gathering all your ingredients and setting up your workspace. Place your parchment-lined baking sheet next to the stove where you’ll be working.
Measure the sugar, water, and have your butter ready in a small dish. The vanilla and salt should also be nearby. Once the caramelization process begins, everything happens quickly, and you won’t have time to measure.
If you’re toasting your peanuts first (recommended for raw peanuts), place them in your dry pan over medium heat, stirring constantly for 2-3 minutes until fragrant. Transfer to a bowl and set aside while you make the caramel.
Cooking Method: Creating the Perfect Caramel
Step 1: In your heavy-bottomed saucepan, combine the sugar and water over medium heat. Stir gently until the sugar dissolves completely.
Step 2: Once dissolved, stop stirring and let the mixture come to a boil. This is important – stirring at this stage can cause crystallization. Swirl the pan occasionally if needed, but resist the urge to stir.
Step 3: Cook for 6-8 minutes, watching as the mixture transforms from clear to light amber. You’re looking for a golden honey color – not too light (won’t have flavor) and not too dark (will taste burnt).
Step 4: When the caramel reaches the perfect amber color, immediately remove from heat and quickly stir in the butter. It will bubble vigorously – this is normal.
Step 5: Add the peanuts all at once and stir quickly to coat every nut. Work fast but thoroughly, ensuring even coverage.
Step 6: Add the salt and vanilla (if using), stirring to distribute evenly.
Spreading and Cooling
Step 7: Immediately pour the caramelized peanuts onto your prepared baking sheet. Working quickly with two forks or a heat-resistant spatula, spread them into a single layer, separating any clumps.
The caramel will be extremely hot – around 300°F – so use caution and keep children and pets away from your workspace.
Step 8: Allow the peanuts to cool completely at room temperature, about 15-20 minutes. As they cool, you can gently separate any nuts that are sticking together. The caramel will harden and develop that signature crispy crackle.
Doneness Check
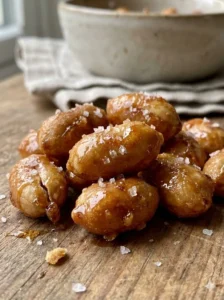
Your caramelized peanuts are perfectly done when the coating is hard and glossy, breaking with a clean snap when you bite into it. The peanuts themselves should be crunchy, not soft or chewy.
If the coating seems sticky after cooling, it didn’t reach the proper temperature. This batch is still edible but won’t have the ideal crunch. Next time, cook the caramel 30-60 seconds longer before adding the nuts.
If the coating tastes burnt, the caramel cooked too long. Watch carefully as it transitions from amber to brown – that’s a window of only 10-20 seconds.
Final Step: Breaking Apart
Once completely cool, break the peanuts apart into individual pieces or small clusters. They’re now ready to eat, package, or store.
Pro Tips for Perfect Caramelized Peanuts
After years of making these addictive treats, I’ve learned exactly what separates good caramelized peanuts from truly exceptional ones.
Avoiding Common Mistakes
Don’t rush the cooling process. It’s tempting to taste your creation immediately, but patience pays off. Fully cooled peanuts develop the best texture and are much easier to separate into individual pieces.
Never make caramelized peanuts on a humid day if you can avoid it. Sugar is hygroscopic (attracts moisture), and humidity can prevent the coating from achieving that perfect crackle. If you must make them in humid conditions, add an extra tablespoon of sugar to compensate.
Use medium heat, not high. While it might be tempting to speed things up, high heat creates uneven caramelization and increases the risk of burning. Medium heat gives you better control and more consistent results.
Don’t double the batch in one pan. If you need larger quantities, make multiple batches. Overcrowding prevents even coating and makes it difficult to spread the nuts properly.
Tool Recommendations
Invest in these tools for consistently better results:
Digital instant-read thermometer – While not strictly necessary, knowing your caramel has reached 300°F (hard crack stage) takes the guesswork out of the process.
Silicone baking mat (Silpat) – Superior to parchment paper for high-heat applications and virtually non-stick. It’s reusable and makes cleanup even easier.
Heavy-bottomed stainless steel or copper pan – Distributes heat more evenly than thin aluminum pans, reducing the risk of burnt spots.
Heat-resistant silicone spatula – Won’t melt or warp when working with hot caramel, and the flexible edge helps you scrape every bit of coating onto the nuts.
Storage & Keeping Them Fresh
Proper storage is essential for maintaining that perfect crunch:
Store in an airtight container at room temperature for up to 3 weeks. Glass jars with tight-fitting lids work beautifully and make lovely gifts.
Add a small packet of food-safe silica gel to the container to absorb any moisture and keep the coating crispy even longer.
Avoid refrigeration – the moisture in refrigerators will make your caramelized peanuts sticky and soft. They’re best kept in a cool, dry pantry.
For longer storage, freeze caramelized peanuts in freezer bags with all air pressed out for up to 3 months. Thaw at room temperature in a sealed container, and they’ll taste freshly made.
If they do become sticky, spread them on a baking sheet and warm in a 250°F oven for 5-7 minutes. Let cool completely before storing again.
Flavor Variations
Once you’ve mastered the basic caramelized peanut recipe, the flavor possibilities are endless. Here are my favorite variations that keep things exciting.
Spicy Twist
For those who love heat with their sweet, try these fiery additions:
Cayenne Caramel Peanuts: Add ½ teaspoon cayenne pepper along with the salt for a subtle kick that builds with each bite.
Chipotle Maple: Replace 2 tablespoons of sugar with maple syrup and add ½ teaspoon chipotle powder for smoky, sweet heat.
Sriracha Honey Glazed: Drizzle cooled peanuts with a mixture of 2 tablespoons honey and 1 teaspoon sriracha, then toss to coat before re-cooling.
Sweet Enhancements
Amplify the sweetness and add depth with these variations:
Vanilla Bean: Split a vanilla bean and scrape the seeds into your caramel for an elegant, aromatic upgrade.
Cinnamon Sugar: Add 1 teaspoon cinnamon to the caramel and toss the still-warm nuts in a mixture of 2 tablespoons sugar and ½ teaspoon additional cinnamon.
Bourbon Maple: Replace the water with 2 tablespoons bourbon and 2 tablespoons maple syrup for a sophisticated, adult version.
Brown Butter: Brown your butter before adding it to the caramel for an incredible nutty, toffee-like depth.
Keto & Paleo Adaptations
Following a specific diet? These modifications maintain the crunch while meeting your nutritional needs:
Keto-Friendly Version: Replace the sugar with a 1:1 blend of erythritol and allulose (such as Lakanto Monkfruit Golden). The texture will be slightly less glossy but still deliciously crunchy. Note that sugar alcohols can crystallize more easily, so work quickly when coating.
Paleo Caramelized Peanuts: Use coconut sugar instead of white sugar (the coating will be darker and have subtle molasses notes) and replace butter with coconut oil or ghee.
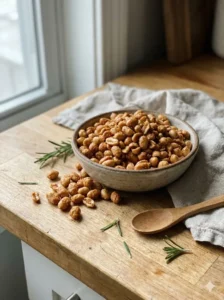
Global Flavors
Travel the world through your taste buds with these internationally inspired versions:
Chinese Five-Spice: Add ½ teaspoon Chinese five-spice powder for an aromatic blend of star anise, cloves, cinnamon, Sichuan pepper, and fennel.
Mexican Chocolate: Mix in 1 tablespoon cocoa powder, ½ teaspoon cinnamon, and a pinch of cayenne for a mole-inspired treat.
Chai Spiced: Combine ½ teaspoon each of cinnamon, ginger, cardamom, and a pinch of clove for warming, aromatic peanuts.
Rosemary Sea Salt: Add 1 tablespoon finely chopped fresh rosemary to the hot caramel and finish with flaky sea salt for a sophisticated, savory-sweet snack.
Serving Suggestions
Caramelized peanuts are incredibly versatile, working beautifully as a standalone snack or as a component in various dishes.
As a snack: Serve in small bowls at parties, package in decorative jars for gifts, or keep a stash in your pantry for when sweet-salty cravings strike.
Salad toppers: Roughly chop and sprinkle over green salads, particularly those with goat cheese, apples, and vinaigrette dressings. They add incredible crunch and a flavor dimension that elevates simple salads.
Dessert garnish: Crush caramelized peanuts and use them to top ice cream, brownies, puddings, or cheesecakes. They’re especially stunning on chocolate desserts.
Yogurt and oatmeal: Add a handful to Greek yogurt or overnight oats for textural contrast and natural sweetness.
Cheese board addition: Include caramelized peanuts on charcuterie boards alongside aged cheddar, brie, or blue cheese. The sweet-salty combination complements both mild and strong cheeses.
Trail mix: Combine with dried cranberries, chocolate chips, and banana chips for an elevated homemade trail mix.
Beverage Pairings
Coffee and caramelized peanuts are a match made in heaven – the bitter notes of dark roast coffee cut through the sweetness perfectly.
Dessert wines like Port, Sauternes, or late-harvest Riesling complement the caramel notes beautifully.
Bourbon or whiskey pairs exceptionally well, especially with the spiced variations. The caramel echoes the vanilla and oak notes in aged spirits.
Hot chocolate or chai tea creates a cozy combination perfect for fall and winter evenings.
FAQs
Can I use honey instead of sugar?
While honey can be used, it creates a different texture and flavor profile. Honey doesn’t harden as much as caramelized sugar, resulting in a chewier, stickier coating rather than the crisp shell you get with traditional caramel. If you prefer honey, use ¾ cup honey and reduce water to 2 tablespoons, but expect a softer result.
Why did my caramel seize up and turn grainy?
This happens when sugar crystals form, usually from stirring the caramel after it starts boiling or from undissolved sugar on the sides of the pan. To prevent this, make sure all sugar is dissolved before the mixture boils, avoid stirring once boiling begins, and consider brushing down the sides of the pan with a wet pastry brush to remove any sugar crystals.
Can I make caramelized peanuts without butter?
Absolutely. You can omit the butter entirely for a dairy-free version, though it will lack some richness. Alternatively, substitute with coconut oil or vegan butter for similar results.
How do I fix caramelized peanuts that turned out sticky?
Spread them on a parchment-lined baking sheet and place in a 250°F oven for 5-10 minutes. This will drive off excess moisture and re-harden the coating. Allow them to cool completely on the counter before storing.
Are caramelized peanuts safe during pregnancy?
Yes, caramelized peanuts made at home with fresh ingredients are safe during pregnancy, provided you don’t have a peanut allergy. The high heat of caramelization eliminates any potential bacteria. However, store-bought versions may contain additives, so homemade is often the better choice for expecting mothers.
Can I use salted peanuts?
You can, but reduce or omit the added salt in the recipe. Pre-salted peanuts may result in an overly salty final product, and the salt on their surface can sometimes interfere with caramel adhesion.
What if I don’t have a candy thermometer?
You don’t need one! Watch for visual cues: the caramel should be a golden amber color (like honey) and have large, slow bubbles. The water test also works – drop a small amount of caramel into ice water; if it immediately hardens into a brittle thread that cracks, it’s ready.
How can I prevent the nuts from clumping together?
Work quickly to spread them on your prepared baking sheet while still hot, and use two forks to separate them as they begin to cool. The first 2-3 minutes of cooling time are critical for preventing large clumps.
Can I add chocolate to caramelized peanuts?
Yes! Once your caramelized peanuts are completely cool, drizzle with melted dark, milk, or white chocolate. Let the chocolate set before storing. This creates an indulgent candy that’s perfect for gifting.
Happy caramelizing!