Smoked Shotgun Shells Recipe (Bacon-Wrapped Perfection in 2 Hours)
The first time I saw smoked shotgun shells trending on social media, I thought they looked ridiculous. Pasta wrapped in bacon? Smoked? It seemed like barbecue gone too far.
Then I tasted one at a tailgate party. My skepticism vanished in approximately 2.5 seconds.
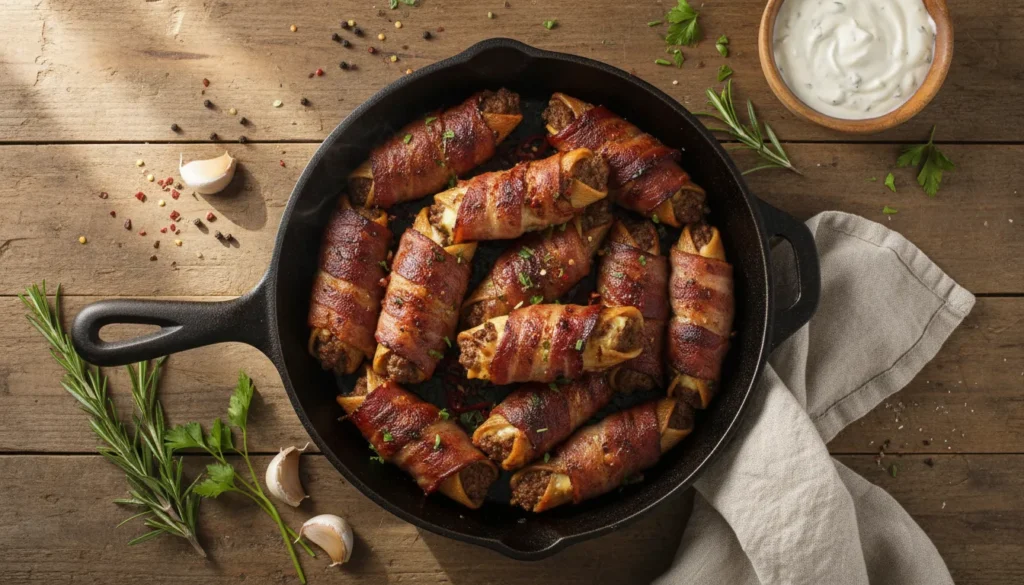
These bacon-wrapped beauties are the most addictive appetizer I’ve ever pulled off a smoker. Tender manicotti shells stuffed with seasoned meat and gooey cheese, completely encased in crispy smoked bacon, glazed with tangy barbecue sauce—they disappear faster than I can make them.
I’ve tested this smoked shotgun shells recipe at least 30 times, tweaking filling ratios, cooking temperatures, and that critical refrigeration time. The result? A foolproof method that delivers perfectly cooked pasta every single time, with zero crunchy spots and maximum flavor.
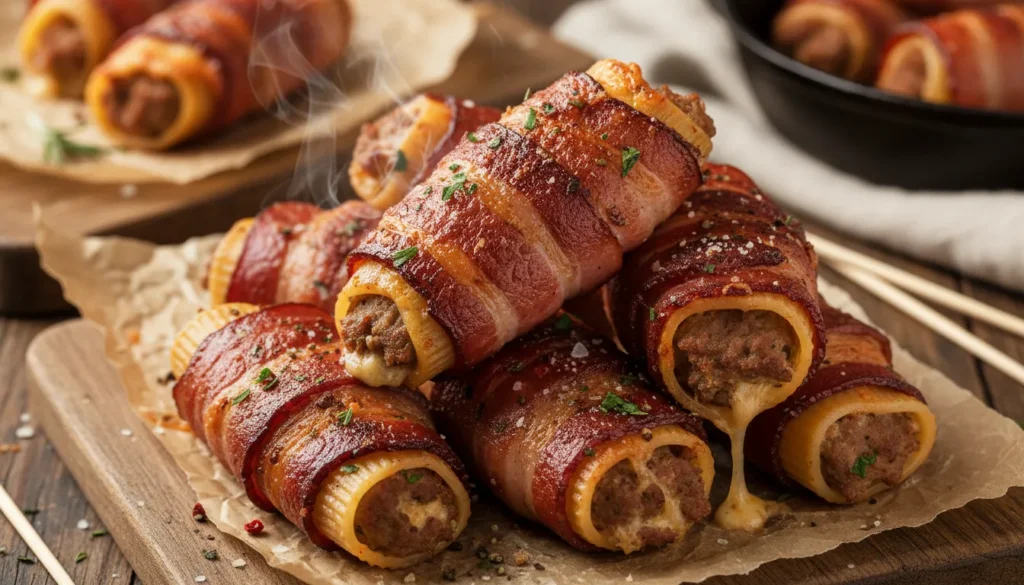
What Are Smoked Shotgun Shells?
Despite the intimidating name, smoked shotgun shells are surprisingly simple. They’re large pasta tubes (manicotti shells) stuffed with a savory meat and cheese mixture, wrapped in bacon, and slow-smoked until everything melds into crispy, melty perfection.
The “shotgun shell” nickname comes from their appearance—the tubular pasta does look remarkably like ammunition. But there’s nothing dangerous about these except how dangerously addictive they are.
The magic happens during the smoking process. As the bacon renders, its fat bastes the pasta, helping it cook through without boiling. The cheese melts into the meat. The barbecue sauce caramelizes into a sticky-sweet glaze. Everything you love about barbecue packed into a handheld appetizer.
Why This Smoked Shotgun Shells Recipe Works
I’ve seen countless versions of this recipe online, and I’ve tried most of them. Here’s what makes mine different: I parboil the pasta shells for exactly 2 minutes before stuffing.
I know, I know. Most recipes say to use raw pasta and let it “cook from the moisture in the filling.” That works sometimes. But I’ve bitten into too many shotgun shells with crunchy ends or undercooked centers to trust that method.
The quick parboil softens the pasta just enough to ensure even cooking on the smoker, while keeping it firm enough to stuff without breaking. It adds 5 minutes to your prep time and eliminates all the guesswork.
The second secret? Ground pork sausage mixed with cream cheese. The cream cheese adds incredible moisture and richness that keeps the filling from drying out during the 90-minute smoke.
Essential Ingredients for Perfect Shotgun Shells
The Pasta
You need manicotti shells—those large tube-shaped pasta you find in the Italian section. Don’t substitute cannelloni or jumbo shells. The size and shape matter for even cooking and easy bacon wrapping.
One standard box (8 oz) contains about 14 shells. I usually make 2 boxes because these disappear fast.
The Filling
- 1 lb ground pork sausage (mild or spicy Italian, your choice)
- 8 oz cream cheese, softened to room temperature
- 1 cup sharp cheddar cheese, shredded
- 1 cup pepper jack cheese, shredded (or more cheddar if you prefer less heat)
- 2 teaspoons BBQ rub of your choice
- Optional: 2 tablespoons diced jalapeños for extra kick
The Bacon
Regular-cut bacon (not thick-cut!) is crucial. You need 2 slices per shell—28 slices total for 14 shells. Thin bacon wraps more easily and crisps up perfectly during smoking.
Thick-cut bacon stays chewy and doesn’t render enough fat to properly cook the pasta.
The Glaze
1 cup BBQ sauce—Kansas City-style (thick and sweet) works best. The thickness helps it cling to the bacon and creates that gorgeous caramelized coating.
Thin vinegar-based Carolina sauces drip off before they can do their job.
Step-by-Step: How to Make Smoked Shotgun Shells
Recipe Card
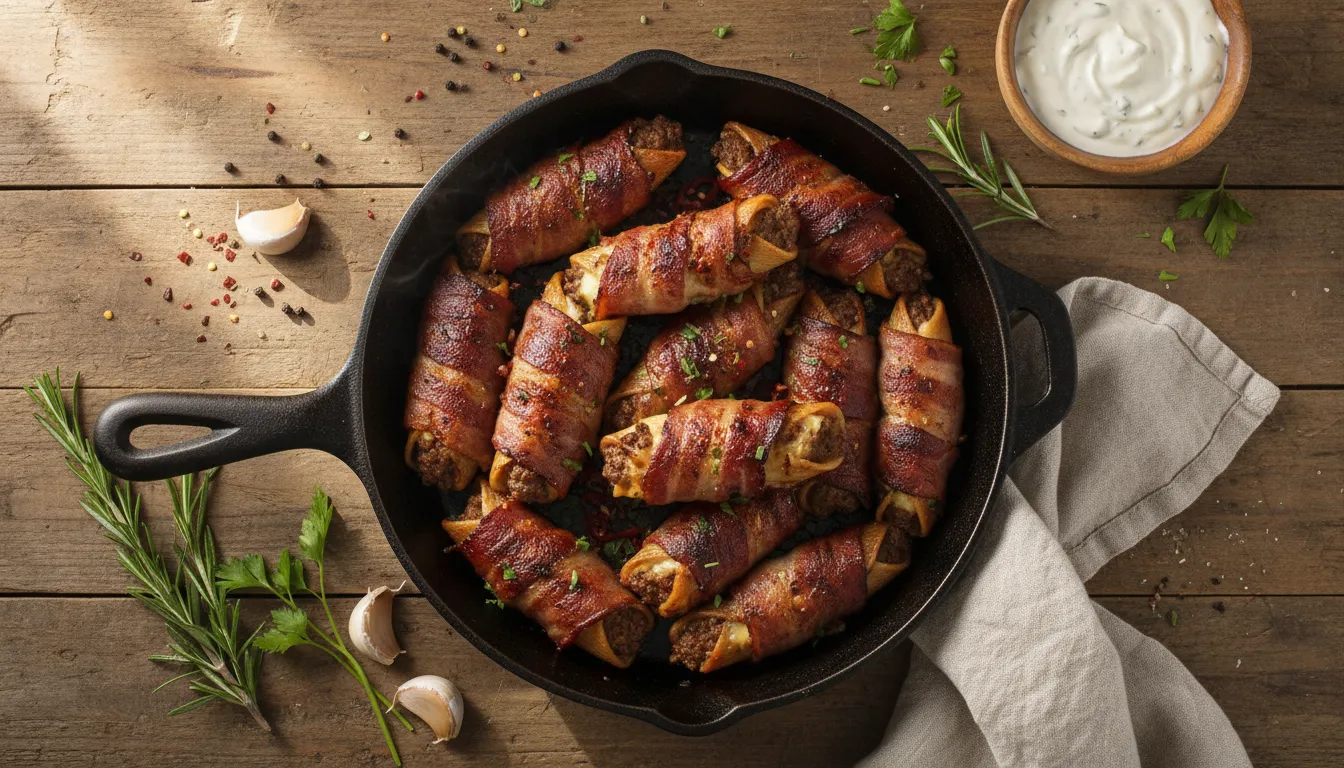
🛠 Equipment Needed
- Smoker or Pellet Grill
- Wire Rack
- Baking Sheet
- Meat Thermometer
- Piping Bag (optional)
Step 1: Parboil the Pasta (5 Minutes)
Bring a large pot of salted water to a rolling boil. Drop in your manicotti shells and cook for exactly 2 minutes. Set a timer—don’t wing it.
Drain immediately and rinse with cool water to stop the cooking. Lay them on a clean kitchen towel to dry completely. This prevents the shells from tearing when you stuff them.
Step 2: Make the Filling (10 Minutes)
In a large mixing bowl, combine the ground sausage, softened cream cheese, both shredded cheeses, BBQ rub, and jalapeños if using.
Mix thoroughly with your hands (yes, hands work best—get in there). You want everything evenly distributed with no cream cheese lumps. The mixture should be smooth and cohesive.
Step 3: Stuff the Shells (15 Minutes)
Here’s the technique that prevents breaking: stuff from both ends toward the middle.
Take a generous tablespoon of filling and pack it into one end of a manicotti shell, pushing it about halfway through. Flip the shell and stuff from the opposite end until the two portions meet in the middle.
Pack it firmly but don’t force it—you don’t want the pasta to crack. Each shell should be completely full with no air pockets.
Pro tip: A piping bag with a large tip makes this infinitely easier. Just cut a corner off a gallon Ziploc bag if you don’t have a piping bag.
Step 4: Wrap in Bacon (20 Minutes)
Take 2 slices of bacon per shell. Starting at one end, spiral-wrap the first slice around the pasta tube at an angle, overlapping slightly as you go. Secure the end by tucking it under itself.
Take your second slice and wrap it around any gaps, covering as much exposed pasta as possible. The goal is complete bacon coverage—exposed pasta dries out and gets crunchy.
Place each wrapped shell seam-side down on a wire rack set over a rimmed baking sheet.
Step 5: Refrigerate (Minimum 4 Hours, Overnight is Better)
This step is absolutely critical. Cover the baking sheet with plastic wrap and refrigerate for at least 4 hours, preferably overnight.
During this time, the meat mixture releases moisture into the pasta, which softens it further and ensures tender results. Skip this step and you’ll have crunchy pasta. I’ve tested 1-hour rests, 2-hour rests, and 3-hour rests. None of them work as well as the full overnight rest.
Step 6: Smoke at 250°F (90 Minutes)
Preheat your smoker to 250°F. I use hickory or pecan pellets for a medium smoke flavor that complements the bacon and barbecue sauce without overwhelming everything.
Apple or cherry wood work too if you prefer something milder.
Place the shotgun shells (still on the wire rack and baking sheet) into the smoker. Smoke for 60 minutes undisturbed.
Step 7: Glaze and Finish (30 Minutes)
After the first hour, brush each shell generously with BBQ sauce, coating all sides. Return to the smoker for another 30 minutes, or until the internal temperature reaches 165°F and the pasta is fork-tender.
The bacon should be crispy, the sauce caramelized, and the cheese visibly melted inside when you peek at the ends.
Step 8: Rest and Serve
Remove from the smoker and let rest for 5 minutes. This allows the filling to set slightly, making them easier to handle.
Slice each shell in half on a diagonal for perfect party-sized portions. Serve with extra BBQ sauce, ranch dressing, or blue cheese for dipping.
Game-Changing Pro Tips
Use a meat thermometer. Check the center of the thickest shell. It needs to hit 165°F for food safety and perfectly cooked pasta.
Don’t skip the overnight rest. I cannot stress this enough. Every recipe that promises you can skip this step is lying. The pasta will be crunchy in spots without adequate moisture absorption time.
Rotate the pan halfway through. Even the best smokers have hot spots. Rotating ensures even cooking and prevents one side from getting too dark.
Make them ahead. You can stuff and wrap these up to 24 hours in advance. Keep refrigerated until you’re ready to smoke.
Freeze for later. Wrap each smoked shotgun shell individually in foil, then freeze in a gallon bag for up to 2 months. Reheat at 350°F for 20 minutes.
Common Mistakes to Avoid
Mistake #1: Using thick-cut bacon. It won’t crisp properly and the fat won’t render enough. Stick with regular-cut.
Mistake #2: Not covering the pasta completely. Any exposed pasta will dry out and turn rock-hard. Overlap your bacon wraps generously.
Mistake #3: Smoking at too high a temperature. Over 275°F and the bacon burns before the pasta cooks through. 250°F is the sweet spot.
Mistake #4: Not checking multiple shells. If you’re making a big batch, different shells may cook at different rates depending on size and smoker position. Check several with your thermometer.
Mistake #5: Serving them whole. Cut them in half! Whole shells are awkward to eat and too big for most appetizer situations.
Flavor Variations to Try
Breakfast Shotgun Shells: Use breakfast sausage, add scrambled eggs to the filling, and serve with maple syrup for dipping.
Buffalo Chicken Shells: Substitute ground chicken, add Frank’s RedHot to the filling, use blue cheese crumbles, and glaze with buffalo sauce.
Tex-Mex Shells: Use chorizo, add taco seasoning, stuff with pepper jack and cotija cheese, glaze with chipotle BBQ sauce.
Pizza Shells: Mix Italian sausage with pizza sauce, mozzarella, and pepperoni bits. Skip the BBQ sauce and brush with garlic butter instead.
What to Serve with Smoked Shotgun Shells
These are rich, so pair them with lighter sides:
- Coleslaw (creamy or vinegar-based)
- Pickles and pickled vegetables
- Corn on the cob
- Potato salad
- Fresh vegetable platter with ranch
For more tailgating recipes, check out our Ultimate Smoked Wings Guide and Best BBQ Sides for Feeding a Crowd.
Frequently Asked Questions
- Can I make shotgun shells in the oven instead of a smoker?
Absolutely! Preheat your oven to 350°F. Place the bacon-wrapped shells on a wire rack over a baking sheet and bake for 60 minutes, then brush with BBQ sauce and bake another 15-20 minutes until bacon is crispy and internal temp hits 165°F. You’ll lose the smoky flavor, but they’re still delicious.
- How do I prevent the pasta from being crunchy?
Parboil the shells for 2 minutes, ensure complete bacon coverage, refrigerate overnight before smoking, and don’t skip the BBQ sauce glaze—it adds crucial moisture.
- Can I use ground beef instead of sausage?
Yes, but use 80/20 ground beef for enough fat content. Lean beef dries out. You’ll want to add extra seasoning since beef is milder than sausage—try 1 tablespoon of Italian seasoning plus garlic powder and onion powder.
- How long do leftover shotgun shells keep?
Refrigerate in an airtight container for up to 4 days. Reheat at 350°F for 15 minutes, or microwave in 30-second intervals (though the bacon won’t be as crispy).
- Can I prep these the night before?
Yes! Stuff, wrap, and refrigerate up to 24 hours before smoking. In fact, this is ideal since the overnight rest improves the final texture.
Why These Are the Ultimate Game Day Appetizer
Smoked shotgun shells check every box for the perfect party food: they’re handheld, bacon-wrapped, cheese-stuffed, and practically impossible to mess up once you know the tricks.
I’ve brought these to Super Bowl parties, backyard barbecues, potlucks, and camping trips. They’re always the first thing to disappear. Always. I’ve had people offer to trade me other food for my last shotgun shell.
The combination of crispy smoked bacon, tender pasta, seasoned meat, and melted cheese creates this incredible texture contrast that keeps you reaching for just one more. The BBQ glaze adds that perfect sweet-tangy finish.
The Bottom Line
Smoked shotgun shells transform humble pasta tubes into the most crave-worthy appetizer you’ll ever make. With proper parboiling, overnight resting, and low-and-slow smoking at 250°F, you’ll get tender pasta, crispy bacon, and gooey cheese every single time.
This recipe feeds a crowd, holds well, reheats beautifully, and scales up easily. Make a double batch—you’ll wish you had.
Rate this recipe and tell us your favorite filling variation in the comments!